Implementing business automation can bring substantial benefits, but it’s essential to approach it carefully to avoid common pitfalls. Mistakes in automation can lead to inefficiencies, increased costs, and frustration. Here are some common business automation mistakes and how to avoid them.
Common Business Automation Mistakes
Lack of Clear Objectives
Mistake: Automating without clear goals can lead to wasted resources and ineffective processes.
Solution: Define specific objectives for your automation efforts, such as reducing costs, improving efficiency, or enhancing customer service.
Automating the Wrong Processes
Mistake: Not all processes are suitable for automation. Automating complex or poorly understood processes can create more problems than it solves.
Solution: Carefully assess which processes are best suited for automation, focusing on repetitive, time-consuming tasks that have clear steps and outcomes.
Ignoring Employee Training
Mistake: Failing to train employees on new automation tools can lead to resistance and improper use of the technology.
Solution: Provide comprehensive training and support to ensure employees understand how to use automation tools effectively and embrace the changes.
Overlooking Integration
Mistake: Implementing automation tools that do not integrate well with existing systems can create data silos and inefficiencies.
Solution: Choose automation tools that integrate seamlessly with your current systems and workflows to ensure smooth data flow and collaboration.
Neglecting to Monitor and Optimize
Mistake: Setting up automation and forgetting about it can lead to outdated processes and missed opportunities for improvement.
Solution: Continuously monitor automated processes, collect feedback, and make adjustments as needed to optimize performance and achieve desired outcomes.
Failure to Measure and Iterate
Problem: Neglecting to measure the impact of automation initiatives and iterate based on feedback can result in missed opportunities for optimization and improvement.
Solution: Establish metrics to track the performance and effectiveness of automated processes, gather feedback from users, and continuously iterate to refine and optimize workflows.
Conclusion
By avoiding these common business automation mistakes and adopting a strategic, thoughtful approach to implementation, businesses can unlock the full potential of automation to drive efficiency, productivity, and growth. Remember to align automation efforts with business objectives, prioritize data quality and integration, and invest in user training and support to maximize the benefits of automation across the organization.
Field service management (FSM) software has become a vital tool for businesses that provide on-site services, such as maintenance, repairs, and installations. FSM software helps manage field operations efficiently, improving productivity, customer satisfaction, and overall business performance. Let’s explore the benefits of field service management software and how it can transform your business operations.
What is Field Service Management Software?
Field service management software is a platform that helps businesses manage and coordinate their field operations. It typically includes features for scheduling and dispatching technicians, tracking work orders, managing inventory, and providing real-time updates.
Key Benefits of Field Service Management Software
Improved Scheduling and Dispatching: FSM software optimizes the scheduling and dispatching of field technicians, ensuring that the right person is sent to the right job at the right time.
Enhanced Productivity: By automating various field service tasks, such as work order management and route optimization, FSM software helps technicians complete more jobs in less time.
Better Inventory Management: FSM systems track inventory levels and usage, ensuring that technicians always have the necessary parts and tools to complete their tasks.
Real-Time Updates: Provides real-time updates on job status, technician location, and other critical information, allowing managers to make informed decisions quickly.
Improved Customer Satisfaction: Faster response times, accurate job tracking, and efficient service delivery lead to higher customer satisfaction and loyalty.
Enhanced Communication: FSM software facilitates better communication between field technicians, office staff, and customers, ensuring that everyone is informed and aligned.
Data-Driven Insights: Offers analytics and reporting tools that provide insights into field operations, helping businesses identify areas for improvement and optimize performance.
Specific Advantages for Different Business Functions
Technicians: FSM software provides technicians with all the information they need, such as job details, customer history, and inventory availability, improving their efficiency and effectiveness.
Dispatchers: Automates scheduling and dispatching processes, reducing manual errors and ensuring optimal allocation of resources.
Managers: Offers real-time visibility into field operations, enabling managers to monitor performance, address issues promptly, and make data-driven decisions.
Customers: Enjoys faster and more reliable service, with accurate updates on job status and timely completion of work.
How to Implement Field Service Management Software
Assess Your Needs: Identify the specific challenges and requirements of your field service operations.
Choose the Right FSM Software: Research different FSM solutions and select one that meets your business needs and budget. Popular options include ServiceTitan, FieldEdge, and Jobber.
Plan the Implementation: Develop a detailed plan that outlines the steps for implementing the FSM system, including data migration, system configuration, and user training.
Train Your Team: Ensure that all users are trained on how to use the FSM software effectively. Provide ongoing support and resources to help them get the most out of the system.
Monitor and Optimize: Continuously monitor the performance of the FSM software and make adjustments as needed to optimize its use and ensure it meets your business goals.
FAQs
Q: Is FSM software suitable for small businesses? A: Yes, FSM software can benefit businesses of all sizes by improving efficiency, reducing costs, and enhancing customer satisfaction.
Q: How does FSM software improve technician productivity? A: FSM software automates scheduling, provides real-time updates, and ensures that technicians have all the information and tools they need, allowing them to complete more jobs efficiently.
Q: Is it difficult to implement FSM software? A: The complexity of implementation can vary, but with proper planning and support from the software provider, the process can be smooth and manageable.
Conclusion
Field service management software is a powerful tool that can significantly enhance your field operations and customer satisfaction. By improving scheduling, enhancing productivity, and providing real-time updates, FSM software helps businesses deliver exceptional service and optimize their performance. Invest in the right FSM software to take your field service operations to the next level and achieve greater success.
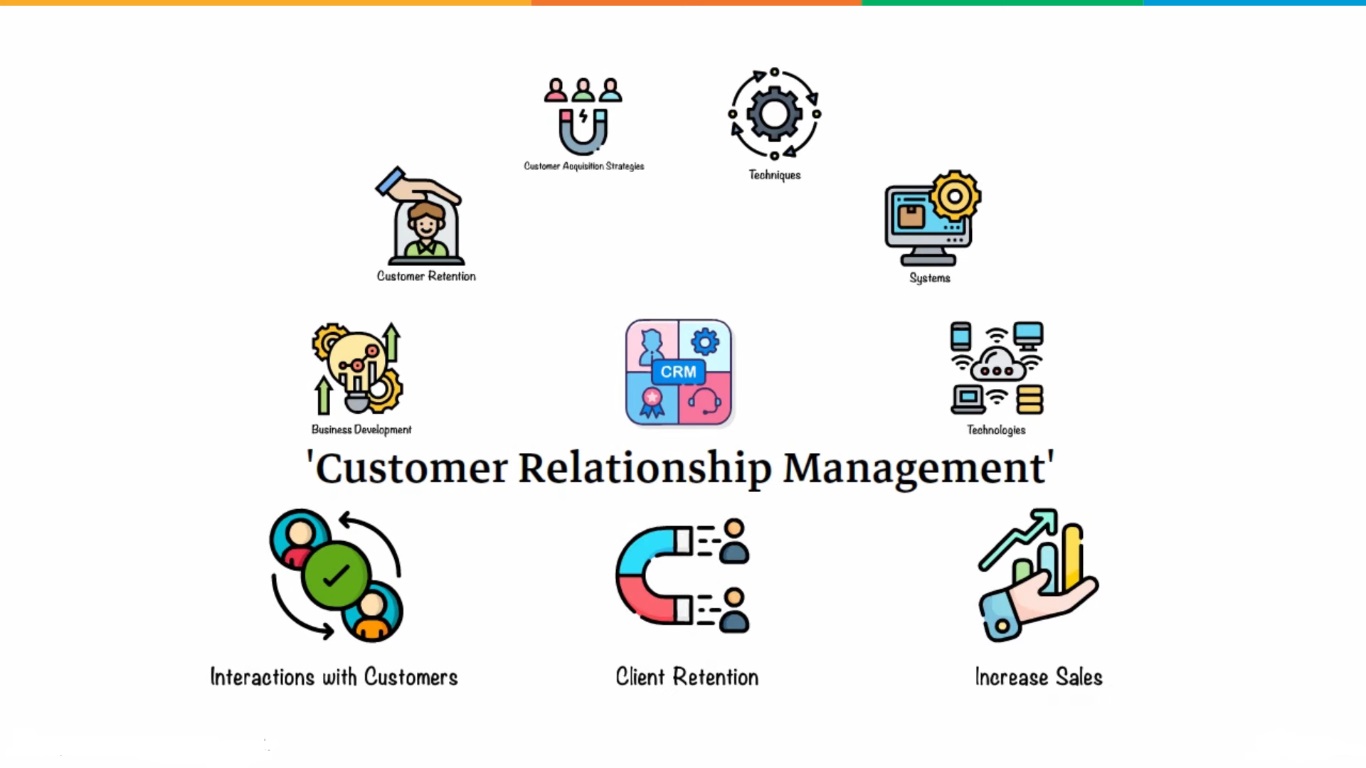
Customer Relationship Management (CRM) systems have become a cornerstone for businesses aiming to improve their interactions with customers. Whether you’re a small business or a large enterprise, the benefits of a CRM system can significantly enhance your operations, customer satisfaction, and overall business growth. Let’s delve into the myriad benefits of implementing a CRM system.
What is a CRM System?
A CRM system is a technology platform that helps businesses manage their interactions with current and potential customers. It centralizes customer information, automates sales and marketing processes, and provides insights into customer behavior and business performance.
Key Benefits of a CRM System
Centralized Data Management: CRM systems store all customer data in one place, making it easy for teams to access and update information, ensuring everyone is on the same page.
Improved Customer Relationships: By having a complete view of customer interactions, businesses can provide more personalized and timely responses, enhancing customer satisfaction.
Increased Sales: CRM systems help manage leads more effectively, track sales activities, and provide insights into sales performance, leading to higher conversion rates.
Enhanced Marketing Efforts: CRMs enable targeted marketing campaigns by segmenting customers based on various criteria, ensuring the right message reaches the right audience.
Better Customer Service: CRMs streamline customer service processes, providing agents with all necessary information to resolve issues quickly and efficiently.
Improved Efficiency: Automating routine tasks such as data entry, follow-ups, and reporting frees up time for employees to focus on more strategic activities.
Data-Driven Decision Making: CRMs offer robust analytics and reporting tools that provide insights into customer behavior, sales trends, and campaign effectiveness, helping businesses make informed decisions.
Specific Advantages for Different Business Functions
Sales Teams: CRMs help track interactions with leads and customers, set reminders for follow-ups, and provide insights into sales performance, making it easier to close deals.
Marketing Teams: By segmenting customers and tracking campaign performance, CRMs enable more effective and personalized marketing strategies.
Customer Service Teams: Access to detailed customer histories allows service agents to resolve issues more efficiently and provide a better customer experience.
Management: CRMs provide comprehensive reports and dashboards that give managers a clear view of business performance, helping in strategic planning and decision-making.
How to Implement a CRM System
Define Your Goals: Determine what you want to achieve with your CRM system, such as improving customer service, increasing sales, or enhancing marketing efforts.
Choose the Right CRM: Research different CRM solutions and choose one that fits your business needs and budget. Popular options include Salesforce, HubSpot CRM, and Zoho CRM.
Plan the Implementation: Develop a detailed plan that outlines the steps for implementing the CRM system, including data migration, system configuration, and user training.
Train Your Team: Ensure that all users are trained on how to use the CRM system effectively. Provide ongoing support and resources to help them get the most out of the system.
Monitor and Optimize: Continuously monitor the performance of the CRM system and make adjustments as needed to optimize its use and ensure it meets your business goals.
FAQs
Q: Can a CRM system benefit small businesses? A: Yes, CRM systems can benefit businesses of all sizes by improving efficiency, enhancing customer relationships, and providing valuable insights.
Q: How long does it take to implement a CRM system? A: The implementation time can vary depending on the complexity of the system and the size of the business. It can range from a few weeks to several months.
Q: Is it expensive to maintain a CRM system? A: The cost of maintaining a CRM system can vary. However, many CRMs offer scalable pricing plans that can fit different budgets.
Conclusion
A CRM system is a powerful tool that offers numerous benefits for businesses looking to improve their customer interactions and streamline their operations. By centralizing data, enhancing customer relationships, and providing valuable insights, a CRM system can significantly boost your business efficiency and growth. Invest in a CRM system and take your customer relationship management to the next level.
Artificial Intelligence (AI) is no longer a futuristic concept; it’s a transformative reality reshaping how businesses operate. AI-powered automation, in particular, is leading the charge, revolutionizing industries with unprecedented efficiency and innovation. Let’s dive into how AI-powered automation is changing the game and why your business should embrace it.
What is AI-Powered Automation?
AI-powered automation refers to the use of artificial intelligence technologies to perform tasks that typically require human intelligence. This includes understanding natural language, recognizing patterns, learning from data, and making decisions. By integrating AI into automation, businesses can streamline operations, reduce errors, and enhance productivity.
Benefits of AI-Powered Automation
Increased Efficiency: AI can process vast amounts of data quickly and accurately, performing tasks in seconds that would take humans hours or even days.
Cost Savings: Automation reduces the need for manual labor, cutting down on operational costs. Businesses can reallocate resources to more strategic areas.
Improved Accuracy: AI minimizes human errors, ensuring high-quality outputs and consistent performance.
Scalability: AI systems can handle increasing workloads without compromising performance, making it easy to scale operations.
24/7 Operations: Unlike humans, AI systems can work around the clock, ensuring continuous productivity.
Applications of AI-Powered Automation
AI-powered automation is versatile and applicable across various sectors:
Customer Service: AI chatbots provide instant responses to customer inquiries, improving satisfaction and freeing up human agents for more complex issues.
Finance: AI algorithms automate fraud detection, transaction processing, and investment analysis.
Healthcare: AI-powered diagnostic tools assist doctors in identifying diseases early and developing personalized treatment plans.
Manufacturing: Robots powered by AI optimize production lines, ensuring efficient and error-free manufacturing processes.
How to Implement AI-Powered Automation in Your Business
Identify Pain Points: Start by identifying areas in your business that are repetitive, time-consuming, or prone to errors.
Choose the Right Tools: Research and select AI tools that best suit your business needs. Popular options include IBM Watson, Google AI, and Microsoft Azure AI.
Develop a Strategy: Create a roadmap for implementation, outlining the steps and timeline for integrating AI automation into your operations.
Train Your Team: Ensure your employees are trained to work with AI tools. This might involve hiring specialists or providing training programs.
Monitor and Optimize: Continuously monitor the performance of AI systems and make adjustments as needed to ensure optimal performance.
FAQs
Q: Is AI-powered automation expensive to implement? A: While there can be initial costs, the long-term benefits, such as cost savings and increased efficiency, often outweigh the initial investment.
Q: Can AI-powered automation replace human jobs? A: AI can automate repetitive tasks, allowing humans to focus on more strategic and creative roles. It often complements human work rather than replacing it entirely.
Q: How secure is AI-powered automation? A: Security depends on the implementation. Ensure that your AI tools comply with industry standards and best practices for data security.
Conclusion
AI-powered automation is not just a trend; it’s a necessity for businesses aiming to stay competitive in today’s fast-paced market. By harnessing the power of AI, companies can achieve greater efficiency, reduce costs, and unlock new opportunities for growth. Embrace AI-powered automation and transform your business for the better.
Running a fitness business involves juggling numerous tasks, from managing memberships to scheduling classes and maintaining equipment. Automation can significantly ease these burdens, allowing you to focus on providing exceptional fitness experiences for your clients. Let’s delve into how automation can streamline your fitness business and enhance member satisfaction.
What is Automation in the Fitness Business?
Automation in the fitness industry involves using technology to perform repetitive and time-consuming tasks. This can include everything from automated billing and scheduling to customer communications and marketing. By automating these processes, fitness businesses can operate more efficiently and deliver a superior member experience.
Benefits of Automating Your Fitness Business
Time Savings: Automation handles routine administrative tasks, giving you more time to focus on client engagement and business growth.
Improved Accuracy: Automated systems reduce human errors in scheduling, billing, and member management, ensuring a seamless operation.
Enhanced Member Experience: Personalized communications, easy class bookings, and timely reminders enhance the overall member experience.
Cost Efficiency: Automation reduces the need for manual labor, cutting down operational costs and improving profit margins.
Scalability: Automated systems can easily handle an increasing number of members and classes, allowing your business to grow without added strain.
Key Areas to Automate in Your Fitness Business
Membership Management: Automate sign-ups, renewals, and cancellations to streamline membership processes and reduce manual workload.
Class Scheduling: Use automated scheduling tools to manage class bookings, cancellations, and waitlists, ensuring a smooth scheduling process for members.
Billing and Payments: Implement automated billing systems to handle recurring payments, invoices, and reminders, reducing the risk of missed payments.
Marketing and Communications: Automate email campaigns, social media posts, and SMS notifications to keep members informed and engaged.
Equipment Maintenance: Use automated systems to schedule and track equipment maintenance, ensuring everything is in top condition.
How to Implement Automation in Your Fitness Business
Identify Pain Points: Determine the areas in your business that are most time-consuming and prone to errors.
Choose the Right Tools: Research and select automation tools that meet your business needs. Popular options include Mindbody, Glofox, and Zen Planner.
Integrate Systems: Ensure your automation tools integrate seamlessly with each other and any existing systems you use.
Train Your Team: Provide training to your staff on how to use the new automation tools effectively.
Monitor and Optimize: Continuously monitor the performance of your automation systems and make adjustments to improve efficiency and effectiveness.
FAQs
Q: Can small fitness studios benefit from automation? A: Absolutely! Automation can help small studios manage their operations more efficiently and provide a better member experience.
Q: Is automation expensive to implement? A: While there is an initial investment, the long-term benefits such as cost savings and increased efficiency make it worthwhile.
Q: How can automation improve member retention? A: Automated personalized communications, easy booking processes, and timely reminders can enhance member satisfaction and retention.
Conclusion
Automation is a powerful tool that can transform the way you run your fitness business. By automating routine tasks, you can focus on providing exceptional service and growing your business. Embrace automation to enhance efficiency, reduce costs, and deliver a superior member experience.
In today’s business landscape, customer relationship management (CRM) is more critical than ever. With the rise of digital communication and e-commerce, managing customer interactions efficiently can be a daunting task. Enter automation CRM—a game-changer that simplifies and enhances CRM processes. Let’s explore how automation CRM can benefit your business and streamline your customer management.
What is Automation CRM?
Automation CRM integrates automated processes into customer relationship management systems. This means that routine tasks such as data entry, follow-ups, and customer segmentation are handled automatically, allowing your team to focus on building meaningful relationships with customers.
Benefits of Automation CRM
Time Savings: Automation takes care of repetitive tasks, freeing up time for your sales and customer service teams to engage with customers directly.
Enhanced Accuracy: Automated systems reduce the risk of human error, ensuring that customer data is always accurate and up-to-date.
Improved Customer Experience: Automated follow-ups and personalized interactions make customers feel valued, leading to higher satisfaction and loyalty.
Increased Productivity: With automation handling routine tasks, your team can concentrate on more strategic activities, boosting overall productivity.
Better Insights: Automation CRM provides valuable analytics and insights, helping you understand customer behavior and make data-driven decisions.
Key Features
Automated Data Entry: Automatically captures and updates customer information from various sources, reducing manual input and errors.
Lead Scoring and Management: Prioritizes leads based on predefined criteria, ensuring your sales team focuses on the most promising prospects.
Personalized Communication: Sends personalized emails and messages based on customer behavior and preferences.
Task Automation: Schedules follow-ups, reminders, and other routine tasks to ensure no customer interaction falls through the cracks.
Analytics and Reporting: Provides detailed reports on customer interactions, sales performance, and more, helping you make informed decisions.
How to Implement Automation CRM in Your Business
Assess Your Needs: Identify the CRM tasks that consume the most time and are prone to errors.
Choose the Right CRM Software: Look for CRM solutions that offer robust automation features. Popular options include Salesforce, HubSpot CRM, and Zoho CRM.
Customize Your Automation Workflows: Set up automation workflows tailored to your business processes and customer journey.
Train Your Team: Ensure your team understands how to use the new CRM system and take full advantage of its automation features.
Monitor Performance: Regularly review the performance of your automation CRM system and make adjustments to optimize results.
FAQs
Q: Is automation CRM suitable for small businesses? A: Yes, automation CRM can benefit businesses of all sizes by improving efficiency and customer experience.
Q: Can automation CRM integrate with other tools? A: Most CRM systems offer integrations with various tools such as email marketing platforms, social media, and e-commerce solutions.
Q: How secure is customer data in an automation CRM system? A: Reputable CRM providers implement robust security measures to protect customer data. Always choose a CRM with strong security features and compliance with data protection regulations.
Conclusion
Automation CRM is a powerful tool that can transform the way you manage customer relationships. By automating routine tasks, you can focus on what matters most—building and nurturing customer connections. Invest in an automation CRM system and watch your customer satisfaction and business efficiency soar.
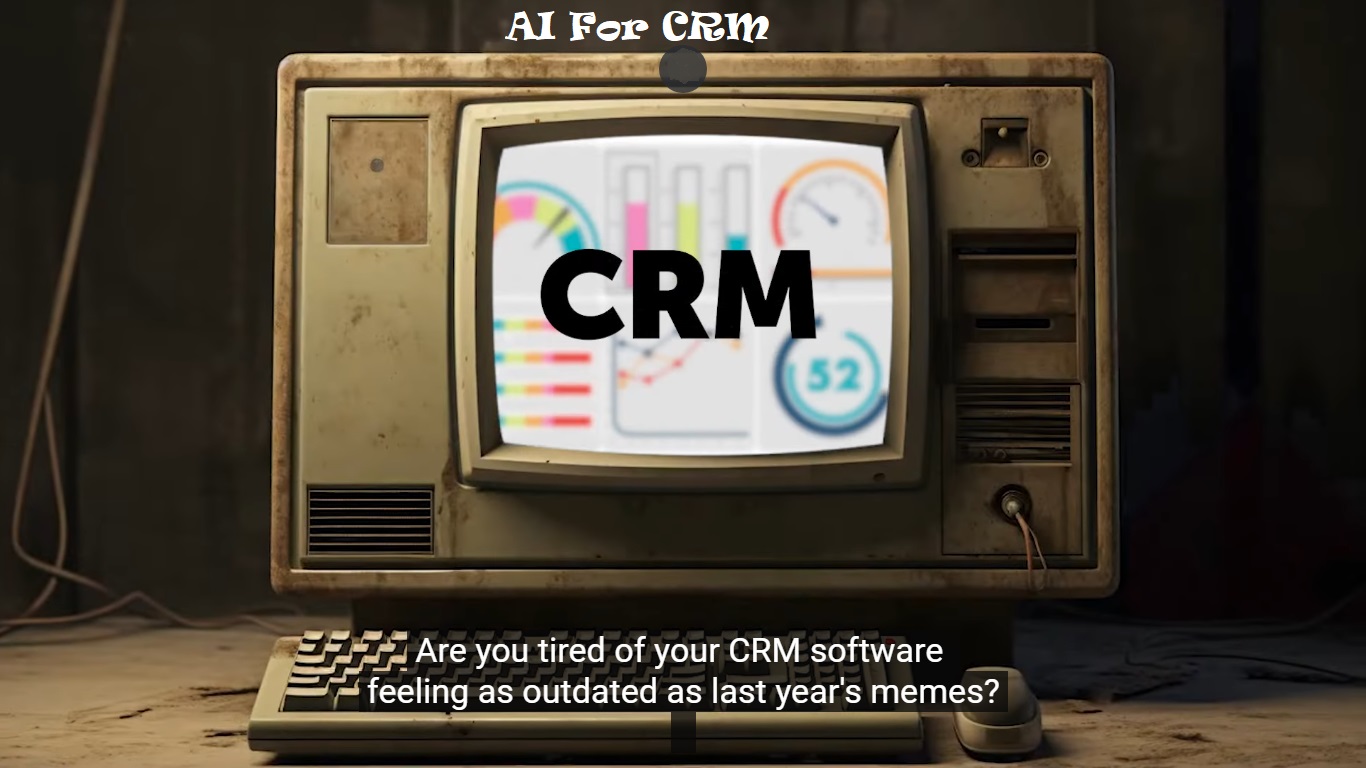
Customer Relationship Management (CRM) systems are at the heart of any successful business strategy. These systems help companies manage interactions with current and potential customers. However, as the business landscape evolves, so do the demands placed on CRM systems. Enter Artificial Intelligence (AI) for CRM – a revolutionary technology that is transforming how businesses interact with customers, make decisions, and ultimately grow. This article delves into how AI is enhancing CRM systems, the benefits it brings, and how businesses can leverage this technology for improved customer relations.
What is AI for CRM?
AI for CRM refers to the integration of artificial intelligence technologies into CRM systems. This integration enables CRM platforms to analyze large volumes of data, predict customer behavior, automate routine tasks, and provide personalized customer experiences. AI-powered CRM systems use machine learning algorithms, natural language processing, and predictive analytics to improve the efficiency and effectiveness of customer relationship management.
Benefits of AI for CRM:
Enhanced Customer Insights: AI algorithms analyze customer data from various touchpoints, providing deeper insights into customer preferences, behaviors, and needs. This helps businesses tailor their marketing strategies and improve customer engagement.
Personalized Customer Experience: AI enables CRM systems to deliver highly personalized experiences by analyzing past interactions and predicting future needs. This personalization can significantly enhance customer satisfaction and loyalty.
Sales Forecasting: Predictive analytics tools powered by AI can forecast sales trends and outcomes with high accuracy. This allows businesses to make informed decisions and develop effective sales strategies.
Automation of Routine Tasks: AI automates repetitive tasks such as data entry, appointment scheduling, and follow-up emails. This not only saves time but also reduces human errors, allowing employees to focus on more strategic activities.
Improved Customer Service: AI-driven chatbots and virtual assistants can handle customer inquiries 24/7, providing instant support and resolving common issues. This enhances customer service efficiency and responsiveness.
Lead Scoring and Management: AI algorithms can score and prioritize leads based on their likelihood to convert, ensuring that sales teams focus on the most promising prospects. This improves conversion rates and sales productivity.
How AI Enhances CRM Functions:
Data Management: AI improves data quality by identifying and correcting inaccuracies, duplicates, and inconsistencies. This ensures that CRM systems have clean and accurate data for better decision-making.
Customer Segmentation: AI analyzes customer data to identify distinct segments based on behavior, preferences, and demographics. This enables targeted marketing campaigns that resonate with specific customer groups.
Sentiment Analysis: Natural language processing (NLP) techniques allow AI to analyze customer feedback and sentiment from social media, reviews, and surveys. This helps businesses understand customer opinions and address issues proactively.
Workflow Optimization: AI streamlines workflows by predicting the best times to contact customers, the most effective communication channels, and the optimal follow-up actions. This leads to more efficient and successful interactions.
Implementing AI in CRM:
Choose the Right CRM Platform: Select a CRM system that supports AI integration and offers the features that align with your business needs. Popular AI-powered CRM platforms include Salesforce Einstein, Microsoft Dynamics 365, and HubSpot.
Integrate AI Tools: Incorporate AI tools such as chatbots, predictive analytics, and machine learning algorithms into your CRM system. Ensure that these tools are compatible with your existing technology stack.
Train Your Team: Provide training to your team on how to use AI-powered CRM features effectively. This includes understanding AI-generated insights and leveraging automation tools for better productivity.
Monitor and Optimize: Continuously monitor the performance of your AI-powered CRM system and make adjustments as needed. Analyze the impact of AI on your customer relationships and overall business performance.
Challenges and Considerations:
Data Privacy and Security: Ensure that your AI-powered CRM system complies with data privacy regulations such as GDPR and CCPA. Protect customer data with robust security measures to prevent breaches and unauthorized access.
Integration Complexity: Integrating AI tools with existing CRM systems can be complex. Work with experienced IT professionals or vendors to ensure a smooth and successful implementation.
Cost: Implementing AI in CRM can be expensive. Evaluate the potential ROI and ensure that the investment aligns with your business goals and budget.
Change Management: Introducing AI-powered CRM requires a cultural shift within the organization. Encourage a positive attitude towards AI and provide support to employees during the transition.
FAQs:
What is AI for CRM? AI for CRM refers to the integration of artificial intelligence technologies into CRM systems to enhance data analysis, automate tasks, and provide personalized customer experiences.
How does AI improve customer insights? AI analyzes large volumes of customer data to identify patterns and trends, providing deeper insights into customer behavior and preferences.
Can AI-powered CRM systems improve sales forecasting? Yes, AI uses predictive analytics to forecast sales trends and outcomes, helping businesses make informed decisions and develop effective sales strategies.
Are AI-powered CRM systems secure? AI-powered CRM systems can be secure if they comply with data privacy regulations and implement robust security measures to protect customer data.
What are the costs associated with implementing AI in CRM? The costs can vary depending on the complexity of the AI tools and the CRM system. It’s important to evaluate the potential ROI and ensure the investment aligns with business goals and budget.
Conclusion:
AI for CRM is revolutionizing the way businesses manage customer relationships. By enhancing data analysis, automating routine tasks, and providing personalized experiences, AI-powered CRM systems enable businesses to stay competitive in a rapidly evolving market. While the implementation of AI in CRM can be complex and costly, the benefits far outweigh the challenges. By choosing the right platform, integrating AI tools, and training your team, you can harness the power of AI to transform your customer relationship management and drive business growth.
In today’s fast-paced digital world, electronic signatures have become a vital part of doing business. They provide a convenient, secure, and efficient way to sign documents without the need for physical presence. One crucial aspect of electronic signatures that ensures their legality and security is electronic signature certification. This article delves into what electronic signature certification is, why it matters, how it works, and the different types available.
Introduction
Electronic signatures (e-signatures) are increasingly used across various industries to streamline processes, reduce paper usage, and enhance transaction speeds. However, for e-signatures to be trusted and legally binding, they must be certified. Electronic signature certification is the process that validates the authenticity and integrity of an e-signature, ensuring that the signature is genuine and that the document has not been tampered with after signing.
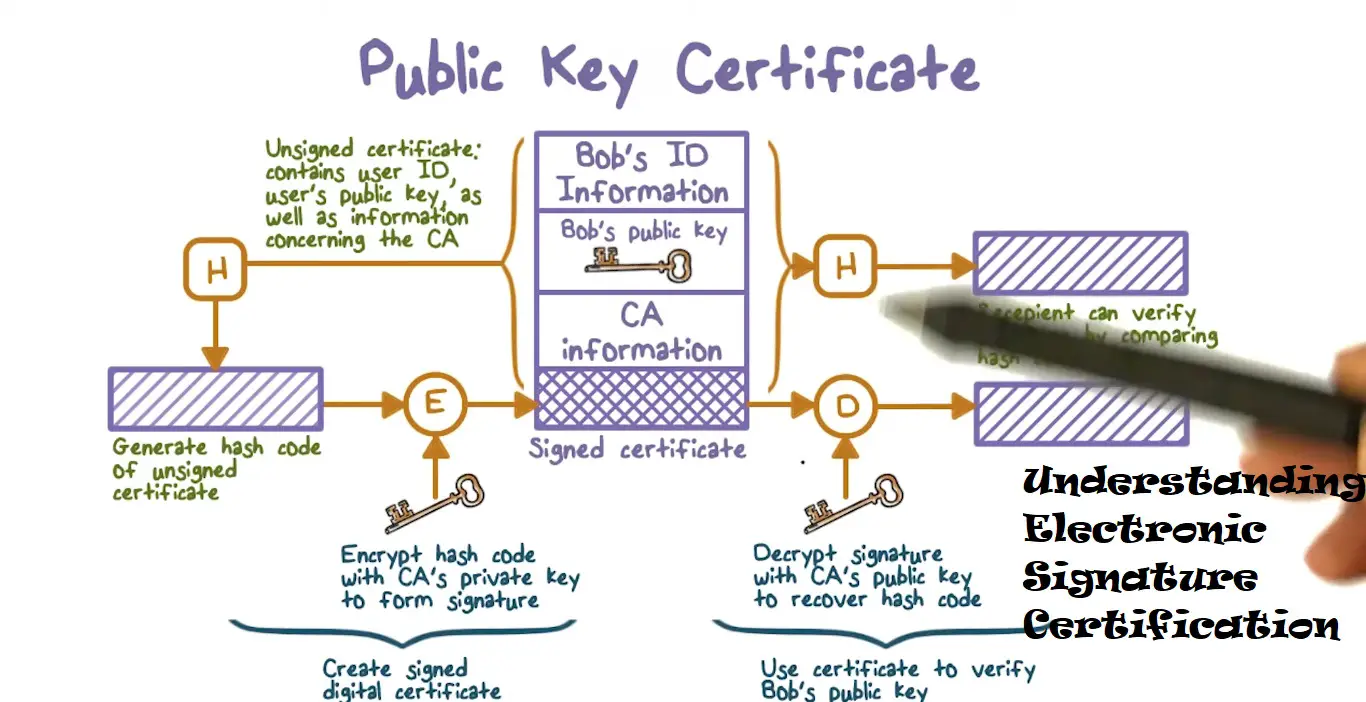
What is Electronic Signature Certification?
Electronic signature certification involves the use of cryptographic technology to verify the identity of the signer and the integrity of the signed document. This process provides assurance that the e-signature is valid and legally binding. Certification typically involves the issuance of a digital certificate by a trusted Certificate Authority (CA), which acts as a trusted third party to verify the signer’s identity.
Importance of Electronic Signature Certification
Legal Validity: Certified electronic signatures are recognized as legally binding in many jurisdictions. Certification ensures that the signature meets legal standards and can be used in court if needed.
Security: Certification adds a layer of security, protecting against fraud and ensuring that the document has not been altered after signing.
Trust: Certified e-signatures build trust between parties, as they provide assurance that the signatures are authentic and the identities of the signers are verified.
Compliance: Many industries, especially those dealing with sensitive information, require compliance with specific regulations (e.g., GDPR, HIPAA). Certification helps meet these regulatory requirements.
How Electronic Signature Certification Works
The process of electronic signature certification typically involves the following steps:
Digital Certificate Issuance: A trusted Certificate Authority (CA) issues a digital certificate to the signer. This certificate includes the signer’s public key and is used to verify their identity.
Signing Process: When a document is signed electronically, a unique digital signature is created using the signer’s private key and the document’s contents. This signature is then encrypted and appended to the document.
Verification: To verify the signature, the recipient uses the signer’s public key (included in the digital certificate). The public key decrypts the digital signature, confirming the signer’s identity and ensuring that the document has not been altered since it was signed.
Types of Electronic Signature Certification
There are several types of electronic signature certification, each offering different levels of security and legal validity:
Simple Electronic Signatures (SES):
Description: Basic form of e-signatures that are not certified by a CA.
Use Cases: Suitable for low-risk transactions where security and legal validity are not primary concerns.
Limitations: Lack of certification means lower security and legal standing.
Advanced Electronic Signatures (AES):
Description: E-signatures that are uniquely linked to the signer, capable of identifying the signer, and created using means that the signer can maintain under their sole control.
Use Cases: Suitable for moderate-risk transactions requiring higher security and legal validity.
Certification: Often certified by a CA to ensure identity verification and document integrity.
Qualified Electronic Signatures (QES):
Description: The highest standard of e-signatures, offering the highest level of security and legal standing. QES are based on a qualified certificate issued by a CA and created using a qualified electronic signature creation device.
Use Cases: Suitable for high-risk transactions where maximum security and legal validity are essential.
Certification: Requires a qualified CA and strict adherence to regulatory standards.
Legal Frameworks and Standards
Various legal frameworks and standards govern the use and certification of electronic signatures. Some of the most prominent include:
eIDAS Regulation (EU):
Scope: Applies across the European Union.
Key Provisions: Establishes a common framework for electronic identification and trust services, including electronic signatures, within the EU. Recognizes SES, AES, and QES, with QES having the highest legal standing.
ESIGN Act (USA):
Scope: Applies across the United States.
Key Provisions: Grants electronic signatures the same legal standing as handwritten signatures, provided certain conditions are met.
UETA (USA):
Scope: Adopted by most US states.
Key Provisions: Provides a legal framework for electronic transactions, ensuring that electronic signatures are legally recognized.
PIPEDA (Canada):
Scope: Applies across Canada.
Key Provisions: Governs the use of electronic signatures and ensures their legal recognition.
Implementing Electronic Signature Certification
Implementing electronic signature certification involves several key steps:
Choose a Trusted CA: Select a reputable Certificate Authority to issue digital certificates. The CA should comply with relevant legal and regulatory standards.
Integrate E-Signature Solution: Implement an e-signature solution that supports certification. Popular options include DocuSign, Adobe Sign, and HelloSign.
Educate Users: Ensure that users understand how to use the e-signature solution and the importance of certification.
Monitor and Audit: Regularly monitor and audit the e-signature process to ensure compliance with legal and regulatory requirements.
Best Practices for Using Certified Electronic Signatures
Verify Identity: Always verify the signer’s identity using a trusted CA before issuing a digital certificate.
Secure Private Keys: Ensure that private keys used to create digital signatures are securely stored and protected from unauthorized access.
Use Strong Encryption: Employ strong encryption methods to protect digital signatures and ensure document integrity.
Regularly Update Software: Keep e-signature software and systems updated to protect against security vulnerabilities.
Maintain Audit Trails: Keep detailed audit trails of all signed documents to provide proof of signing and support legal compliance.
FAQs
1. What is the difference between an electronic signature and a digital signature? An electronic signature is a broad term that refers to any electronic method of signing a document. A digital signature is a type of electronic signature that uses cryptographic techniques to ensure the authenticity and integrity of the signed document.
2. Are certified electronic signatures legally binding? Yes, certified electronic signatures are legally binding in many jurisdictions, provided they meet the required legal standards and are issued by a trusted CA.
3. How do I choose a Certificate Authority (CA)? Choose a CA that is reputable, complies with relevant legal and regulatory standards, and has a proven track record of issuing reliable digital certificates.
4. Can electronic signatures be used for all types of documents? While electronic signatures can be used for many types of documents, certain documents (e.g., wills, certain real estate transactions) may require handwritten signatures by law. Always check the legal requirements for your specific use case.
5. What should I do if I suspect an electronic signature has been tampered with? If you suspect an electronic signature has been tampered with, immediately contact the CA and review the audit trail provided by the e-signature solution. Legal advice may also be necessary.
Conclusion
Electronic signature certification is a crucial component of the e-signature process, providing the security, legal validity, and trust needed for modern digital transactions. By understanding the different types of electronic signature certification and implementing best practices, businesses and individuals can confidently use e-signatures to streamline workflows and protect sensitive information. As technology continues to evolve, electronic signature certification will remain a key element in ensuring the integrity and authenticity of digital signatures.
In the digital age, businesses are increasingly turning to electronic signatures to streamline their workflows, enhance security, and improve efficiency. One of the tools facilitating this transition is the SignNow API. This powerful API integrates seamlessly with various platforms, enabling businesses to incorporate electronic signatures into their existing systems. This article provides an in-depth look at the SignNow API, its features, benefits, and how to get started.
Introduction to SignNow API
SignNow, a leading electronic signature solution, offers an API that allows developers to integrate e-signature functionalities into their applications. The API is designed to be flexible, scalable, and easy to use, making it an ideal choice for businesses of all sizes. Whether you need to automate document signing processes, create custom workflows, or enhance user experiences, the SignNow API provides the tools you need to achieve these goals.
Key Features of SignNow API
Document Management:
Upload and Store Documents: Easily upload and store documents in SignNow’s secure cloud storage.
Document Templates: Create and manage reusable document templates to save time and maintain consistency.
Electronic Signatures:
Multiple Signing Options: Support for various signing methods, including in-person signing, remote signing, and sequential or parallel signing.
Signature Fields: Add customizable signature fields to documents, ensuring clarity and precision.
Integration and Customization:
RESTful API: The SignNow API follows RESTful principles, making it straightforward to integrate with other applications.
Webhooks: Set up webhooks to receive real-time notifications about document status changes and other events.
Security and Compliance:
Data Encryption: All data is encrypted at rest and in transit, ensuring the highest level of security.
Compliance: Compliant with major regulations such as GDPR, HIPAA, and eIDAS, ensuring your e-signatures meet legal standards.
User Management:
Role-Based Access Control: Assign roles and permissions to users, ensuring that only authorized personnel can access sensitive documents.
Audit Trails: Maintain detailed audit trails for all document activities, providing transparency and accountability.
Benefits of Using SignNow API
Enhanced Efficiency: Automate repetitive tasks and reduce the time required to manage and sign documents.
Improved User Experience: Provide a seamless and intuitive signing experience for users, whether they are employees, clients, or partners.
Cost Savings: Reduce costs associated with paper, printing, and manual processes by digitizing document workflows.
Scalability: The API is designed to handle high volumes of documents and signatures, making it suitable for businesses of all sizes.
Legal Compliance: Ensure that your electronic signatures are legally binding and compliant with industry standards and regulations.
Getting Started with SignNow API
1. Create a SignNow Account
To get started with the SignNow API, you’ll first need to create an account on the SignNow platform. You can sign up for a free trial to explore the features and functionalities.
2. Obtain API Credentials
Once your account is set up, navigate to the API settings section to obtain your API credentials. These credentials, including an API key and secret, will be used to authenticate your API requests.
3. Set Up Your Development Environment
Ensure that your development environment is ready to interact with the SignNow API. This typically involves setting up your programming language of choice, installing necessary libraries, and configuring your application to handle API requests and responses.
4. Make Your First API Call
Start by making a simple API call to ensure everything is set up correctly. For example, you can retrieve account information or list the documents available in your SignNow account.
5. Integrate Advanced Features
Once you’re comfortable with basic API calls, you can start integrating more advanced features such as uploading documents, adding signature fields, and setting up webhooks.
6. Test and Deploy
Thoroughly test your integration to ensure it works as expected. Pay special attention to edge cases and error handling. Once testing is complete, deploy your application to production.
Use Cases for SignNow API
Human Resources:
Onboarding: Streamline the onboarding process by allowing new hires to sign employment contracts and other documents electronically.
Performance Reviews: Manage performance review forms and ensure they are signed and stored securely.
Sales:
Contracts and Agreements: Automate the preparation, signing, and management of sales contracts, reducing turnaround time and improving customer satisfaction.
Proposals: Create and send proposals for electronic signature, making it easy for clients to approve and move forward.
Legal:
Client Agreements: Ensure that client agreements are signed promptly and stored securely.
Compliance: Maintain detailed audit trails and ensure compliance with industry regulations.
Healthcare:
Patient Consent Forms: Obtain electronic signatures on consent forms, reducing paperwork and improving efficiency.
HIPAA Compliance: Ensure that all signed documents meet HIPAA standards for protecting patient information.
FAQs
1. What is the SignNow API? The SignNow API is a set of programming interfaces that allow developers to integrate electronic signature functionalities into their applications, enabling secure and efficient document management and signing processes.
2. How do I authenticate with the SignNow API? Authentication is typically done using API credentials (API key and secret). You will include these credentials in the headers of your API requests.
3. Is the SignNow API secure? Yes, the SignNow API uses robust security measures, including data encryption at rest and in transit, to ensure the highest level of security for your documents and signatures.
4. Can I customize the signing experience with the SignNow API? Yes, the API allows for extensive customization, including adding custom fields, setting up signing workflows, and branding the signing interface to match your company’s identity.
5. Is there a free trial available for the SignNow API? Yes, SignNow offers a free trial that allows you to explore the features and functionalities of the API before committing to a paid plan.
Conclusion
The SignNow API is a powerful tool that enables businesses to integrate electronic signature capabilities into their applications, enhancing efficiency, security, and user experience. By understanding its features, benefits, and how to get started, you can leverage the SignNow API to streamline your document workflows and stay ahead in the digital age. Whether you are in human resources, sales, legal, or healthcare, the SignNow API provides the flexibility and scalability needed to meet your electronic signature needs.
In today’s digital world, the need to sign documents electronically has become increasingly common. Whether you’re a professional, student, or just someone who needs to sign an agreement, knowing how to electronically sign a PDF document can save you time and streamline your workflow. This comprehensive guide will walk you through various methods to electronically sign a PDF document using different tools and platforms.
Why Use Electronic Signatures?
Before diving into the how-to, let’s briefly discuss why electronic signatures are beneficial:
Convenience: Sign documents from anywhere at any time.
Speed: Reduce the turnaround time for getting documents signed.
Cost-Effective: Save money on printing, mailing, and storing paper documents.
Security: Enhanced security features such as encryption and audit trails.
Environmentally Friendly: Reduce paper usage and contribute to a greener planet.
Methods to Electronically Sign a PDF Document
There are several methods to electronically sign a PDF document. We’ll cover the most popular ones, including using Adobe Acrobat, online services like DocuSign, mobile apps, and built-in tools in Windows and macOS.
1. Using Adobe Acrobat
Adobe Acrobat is one of the most popular tools for working with PDFs. Here’s how you can use it to sign a PDF:
Open the PDF: Launch Adobe Acrobat Reader and open the PDF document you want to sign.
Select the Fill & Sign Tool: Click on the “Tools” tab and select “Fill & Sign.”
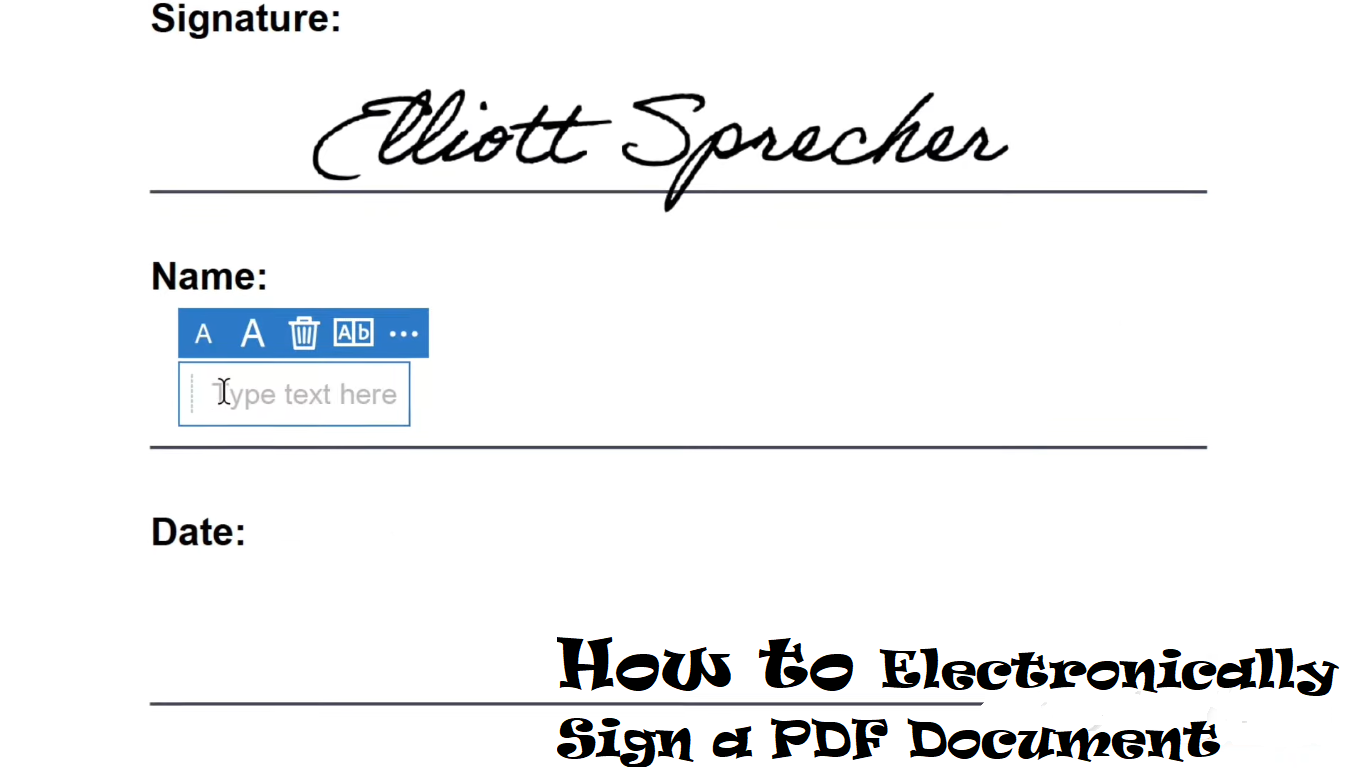
Add Signature:
Click on “Sign” in the toolbar.
Choose “Add Signature” or “Add Initials.”
You can type, draw, or import a signature image.
Place Signature: Click where you want to place the signature in the document.
Save the Document: Save the signed document by clicking “File” > “Save As.”
2. Using Online Services (e.g., DocuSign)
Online services like DocuSign provide a convenient way to sign PDFs without needing to install software. Here’s how:
Create an Account: Sign up for a DocuSign account if you haven’t already.
Upload the Document: Upload the PDF document you want to sign.
Add Signature Fields: Drag and drop signature fields onto the document where signatures are needed.
Sign the Document:
Click on the signature field.
Choose your preferred signature method (type, draw, or upload an image).
Send or Download: Send the document to other signers or download the signed document.
3. Using Mobile Apps
For those who prefer signing documents on the go, mobile apps like Adobe Fill & Sign and DocuSign are excellent options. Here’s how to use Adobe Fill & Sign:
Download and Install: Download Adobe Fill & Sign from the App Store or Google Play.
Open the App: Launch the app and open the PDF document.
Add Signature:
Tap the signature icon.
Choose to create a new signature or use an existing one.
Place Signature: Tap where you want to place the signature.
Save or Share: Save the signed document or share it directly from the app.
4. Using Built-in Tools (Windows and macOS)
Both Windows and macOS have built-in tools to sign PDFs. Here’s how to use them:
Windows (Microsoft Edge):
Open the PDF: Right-click the PDF file and choose “Open with” > “Microsoft Edge.”
Add Signature:
Click on the “Draw” tool in the toolbar.
Use your mouse or touch screen to draw your signature.
Save: Click on the “Save” icon to save the signed document.
macOS (Preview):
Open the PDF: Open the PDF file with the Preview app.
Add Signature:
Click on the “Markup” tool (pen icon).
Click the “Sign” button and create a signature using your trackpad, camera, or an existing image.
Place Signature: Drag the signature to the desired location.
Save: Save the signed document by clicking “File” > “Save.”
Tips for Electronic Signatures
Verify Legality: Ensure that electronic signatures are legally recognized in your jurisdiction.
Use Secure Methods: Use reputable software and services to ensure the security of your signature.
Keep a Copy: Always keep a copy of the signed document for your records.
Authenticate Signers: If you need others to sign, ensure they are authenticated to prevent unauthorized access.
FAQs
1. Are electronic signatures legally binding? Yes, electronic signatures are legally binding in many countries, including the United States (under the ESIGN Act) and the European Union (under the eIDAS Regulation). However, it’s important to verify the legal status in your specific jurisdiction.
2. Can I use a scanned image of my handwritten signature? Yes, many tools allow you to upload a scanned image of your handwritten signature to use as an electronic signature.
3. What if I don’t have access to specialized software or services? You can use built-in tools in Windows and macOS to sign PDFs without needing additional software.
4. How do I ensure the security of my electronic signature? Use reputable tools that offer encryption and other security features. Avoid sharing your signature files and use authentication methods to verify signers.
5. Can I sign documents on my smartphone? Yes, there are several mobile apps, such as Adobe Fill & Sign and DocuSign, that allow you to sign documents directly from your smartphone.
Conclusion
Electronically signing PDF documents is a convenient and efficient way to handle paperwork in the digital age. Whether you use specialized software like Adobe Acrobat, online services like DocuSign, mobile apps, or built-in tools in your operating system, the process is straightforward and secure. By understanding the different methods available, you can choose the one that best fits your needs and ensure that your documents are signed quickly and legally.