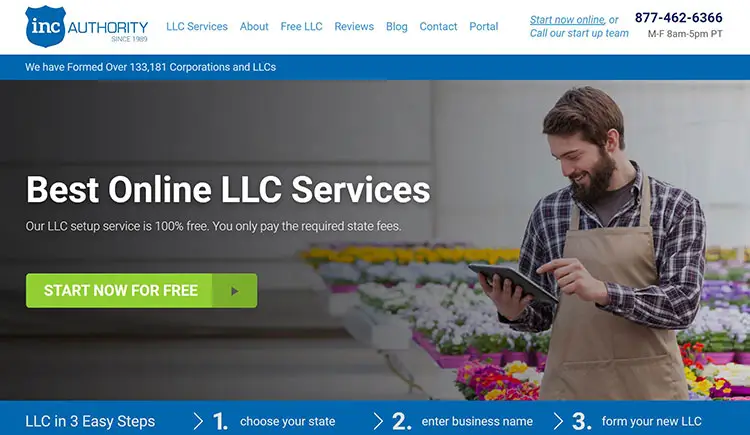
How to Use eSignatures in Google Docs: A Step-by-Step Guide

How to Use eSignatures in Google Docs

Introduction:

In the digital era, signing documents electronically has become a necessity for efficiency and convenience. Google Docs is a popular platform for creating and sharing documents, and integrating eSignatures into your Google Docs workflow can streamline your document management process. This guide will walk you through the process of adding eSignatures to Google Docs using various methods and tools.

What is an eSignature?

An eSignature, or electronic signature, is a digital version of a handwritten signature used to sign documents electronically. It provides a secure, efficient, and legally binding way to sign agreements, contracts, and other important documents without the need for physical presence.

Benefits of Using eSignatures in Google Docs

  • Convenience: Sign documents directly within Google Docs, eliminating the need to switch between different platforms.
  • Efficiency: Speed up the document signing process, reducing turnaround times.
  • Collaboration: Easily share and sign documents with multiple parties.
  • Security: Ensure the integrity and authenticity of documents with advanced encryption and authentication methods.

Methods to Add eSignatures in Google Docs

  1. Using the Google Docs Add-on: DocuSign
  2. Using the Google Docs Add-on: HelloSign
  3. Using Third-Party Tools: Smallpdf and SignRequest
Verified
Most Recommended

Best eSignature service

See how SignNow can streamline your document workflow. Try it free and explore its powerful features.
Rating
On-Going Offer

1. Using the Google Docs Add-on: DocuSign

DocuSign offers a Google Docs add-on that allows you to sign and send documents directly from within Google Docs.

Step-by-Step Guide:

  1. Install the DocuSign Add-on:
    • Open your Google Doc.
    • Click on “Add-ons” in the menu bar.
    • Select “Get add-ons.”
    • Search for “DocuSign” and click on the “+ Free” button to install it.
  2. Authorize the Add-on:
    • Follow the prompts to authorize DocuSign to access your Google account.
  3. Prepare the Document:
    • Open the document you need to sign in Google Docs.
  4. Add Signatures:
    • Click on “Add-ons” again, select “DocuSign,” and then “Sign with DocuSign.”
    • Follow the prompts to add signature fields and sign the document.
  5. Send the Document:
    • Once signed, you can send the document to other recipients directly from within Google Docs.

2. Using the Google Docs Add-on: HelloSign

HelloSign also offers a Google Docs add-on for eSignatures.

Step-by-Step Guide:

  1. Install the HelloSign Add-on:
    • Open your Google Doc.
    • Click on “Add-ons” in the menu bar.
    • Select “Get add-ons.”
    • Search for “HelloSign” and click on the “+ Free” button to install it.
  2. Authorize the Add-on:
    • Follow the prompts to authorize HelloSign to access your Google account.
  3. Prepare the Document:
    • Open the document you need to sign in Google Docs.
  4. Add Signatures:
    • Click on “Add-ons” again, select “HelloSign,” and then “Request Signatures.”
    • Follow the prompts to add signature fields and sign the document.
  5. Send the Document:
    • Once signed, you can send the document to other recipients directly from within Google Docs.

3. Using Third-Party Tools: Smallpdf and SignRequest

If you prefer using other tools, you can use third-party websites like Smallpdf and SignRequest to sign Google Docs.

Using Smallpdf:

  1. Export the Document:
    • Open your Google Doc.
    • Click on “File” > “Download” > “PDF Document (.pdf)” to export your document as a PDF.
  2. Upload to Smallpdf:
    • Go to the Smallpdf website.
    • Select the “eSign PDF” tool.
    • Upload the PDF document you downloaded.
  3. Add Signature:
    • Follow the prompts to create and add your eSignature.
    • Place the signature on the document as needed.
  4. Download the Signed Document:
    • Once signed, download the PDF and re-upload it to Google Drive if needed.

Using SignRequest:

  1. Export the Document:
    • Open your Google Doc.
    • Click on “File” > “Download” > “PDF Document (.pdf)” to export your document as a PDF.
  2. Upload to SignRequest:
  3. Add Signature:
    • Follow the prompts to create and add your eSignature.
    • Place the signature on the document as needed.
  4. Download or Send the Signed Document:
    • Once signed, download the PDF and re-upload it to Google Drive if needed, or send it directly to other recipients.

Legal Validity of eSignatures

eSignatures are legally binding in many countries under regulations such as the ESIGN Act in the United States and eIDAS in the European Union. These regulations ensure that eSignatures have the same legal standing as handwritten signatures, provided they meet certain criteria, such as intent to sign and consent to do business electronically.

FAQs

Q1: Are eSignatures in Google Docs secure?

Yes, eSignatures in Google Docs using tools like DocuSign, HelloSign, and others use advanced encryption and authentication methods to ensure the security and integrity of the signed documents.

Q2: Are eSignatures in Google Docs legally binding?

Yes, eSignatures are legally binding if they meet the requirements set by relevant regulations, such as the ESIGN Act and eIDAS, which include intent to sign and consent to do business electronically.

Q3: Can I use eSignatures for all types of documents in Google Docs?

eSignatures are suitable for most documents, but certain legal and government forms may still require handwritten signatures.

Q4: What are the limitations of free eSignature tools in Google Docs?

Free eSignature tools often have limitations on the number of documents you can sign per month and may lack some advanced features available in paid plans.

Q5: Can eSignatures be used for international transactions?

Yes, eSignatures can be used for international transactions, but it’s essential to ensure compliance with the regulations of the involved countries.

Conclusion

Adding eSignatures to Google Docs is a convenient, efficient, and secure way to handle document signing. Whether using add-ons like DocuSign and HelloSign or third-party tools like Smallpdf and SignRequest, you can streamline your workflow and ensure the legal validity of your signatures. By understanding the methods and legal implications, you can confidently use eSignatures in Google Docs for your personal and professional needs.

How To Add An eSignature To A PDF: A Step-by-Step Guide

How To Add An eSignature To A PDF

Introduction:

In today’s digital world, the need to sign documents electronically is more prevalent than ever. One of the most common formats for documents is PDF (Portable Document Format), and knowing how to add an eSignature to a PDF can save you time and hassle. This article will guide you through the process of adding an eSignature to a PDF using various tools and methods.

What is an eSignature?

An eSignature, or electronic signature, is a digital version of a handwritten signature used to sign documents electronically. eSignatures provide a secure, efficient, and legally binding way to sign agreements, contracts, and other documents without the need for physical presence.

Why Use eSignatures on PDFs?

PDFs are a widely accepted format for official documents due to their compatibility, security features, and ability to preserve document formatting. Adding an eSignature to a PDF ensures the document remains intact and secure while streamlining the signing process.

Methods to Add an eSignature to a PDF

1. Using Adobe Acrobat Reader

Adobe Acrobat Reader is a popular and widely used PDF viewer that also allows you to sign PDFs.

Step-by-Step Guide:

  1. Open the PDF in Adobe Acrobat Reader: Launch Adobe Acrobat Reader and open the PDF document you need to sign.
  2. Select “Fill & Sign” Tool: In the right-hand pane, click on “Fill & Sign.”
  3. Add Signature: Click on the “Sign” icon in the toolbar, then select “Add Signature.”
  4. Choose Signature Type: You can type your name, draw your signature using a mouse or touchscreen, or upload an image of your signature.
  5. Place Signature: Click where you want to place the signature in the PDF.
  6. Save the Document: Save the signed PDF by selecting “File” > “Save” or “Save As.”

2. Using Online eSignature Tools

Several online tools allow you to sign PDFs electronically, such as SignNow, DocuSign, and HelloSign. These tools often provide free trials or limited free services.

Verified
Most Recommended

Best eSignature service

See how SignNow can streamline your document workflow. Try it free and explore its powerful features.
Rating
On-Going Offer

Step-by-Step Guide (Using SignNow as an Example):

  1. Upload the PDF: Go to the SignNow website and upload the PDF document you need to sign.
  2. Create an Account or Log In: If you don’t have an account, you’ll need to create one. Otherwise, log in with your existing credentials.
  3. Add Signature: Select the “Sign” option, then choose to draw, type, or upload your signature.
  4. Place Signature: Click on the document where you want the signature to appear.
  5. Download or Share: Save the signed PDF to your device or share it directly from the platform.

3. Using Mobile Apps

Mobile apps like Adobe Fill & Sign, SignNow, and DocuSign are available for both iOS and Android, making it easy to sign PDFs on the go.

Step-by-Step Guide (Using Adobe Fill & Sign):

  1. Download and Install the App: Download Adobe Fill & Sign from the App Store or Google Play Store and install it on your device.
  2. Open the PDF: Launch the app and open the PDF document you need to sign.
  3. Add Signature: Tap on the signature icon, then choose to create a new signature by drawing, typing, or uploading.
  4. Place Signature: Tap on the location in the PDF where you want the signature to appear.
  5. Save or Share: Save the signed document or share it directly from the app.

Legal Validity of eSignatures on PDFs

eSignatures on PDFs are legally binding in many countries, including the United States, Canada, and European Union member states, under regulations such as the ESIGN Act, UETA, and eIDAS. These regulations ensure that eSignatures have the same legal standing as handwritten signatures, provided they meet certain criteria, such as intent to sign and consent to do business electronically.

pdffilleer
Verified
Most Recommended

PDFfiller

The All-in-One Solution for Secure PDF Editing and Signing

Benefits of Using eSignatures

  • Convenience: Sign documents from anywhere at any time, eliminating the need for in-person meetings.
  • Efficiency: Speed up the document signing process, reducing turnaround times.
  • Cost Savings: Save on printing, mailing, and storage costs.
  • Security: Ensure the integrity and authenticity of documents with advanced encryption and authentication methods.

FAQs

Q1: Are eSignatures secure? Yes, eSignatures use advanced encryption and authentication methods to ensure the security and integrity of the signed documents.

Q2: Can I use eSignatures for all types of documents? eSignatures are suitable for most documents, but certain legal and government forms may still require handwritten signatures.

Q3: How do I know if my eSignature is legally binding? eSignatures are legally binding if they meet the requirements set by relevant regulations, such as the ESIGN Act and eIDAS, which include intent to sign and consent to do business electronically.

Conclusion

Adding an eSignature to a PDF is a straightforward process that can save time and improve efficiency. Whether using Adobe Acrobat Reader, online tools, or mobile apps, eSignatures offer a secure and legally binding way to handle document signing in the digital age. By understanding the methods and legal implications, you can confidently adopt eSignatures for your personal and professional needs.

Microsoft eSignature: A Comprehensive Guide

Microsoft eSignature

Introduction:

In the digital age, eSignatures have become a vital tool for efficient and secure document management. Microsoft offers a variety of solutions for creating and using eSignatures, whether you are using Microsoft Word, Outlook, or other Office applications. This guide will walk you through the process of using eSignatures with Microsoft tools, ensuring you can sign documents quickly and securely.

What is an eSignature?

An eSignature, or electronic signature, is a digital form of a handwritten signature that is used to sign documents electronically. It provides a convenient, secure, and legally binding way to sign agreements and contracts without the need for physical presence.

Verified
Most Recommended

Best eSignature service

See how SignNow can streamline your document workflow. Try it free and explore its powerful features.
Rating
On-Going Offer

Benefits of Using eSignatures in Microsoft:

  • Convenience: Sign documents directly within Microsoft applications without the need to switch between different platforms.
  • Efficiency: Speed up the document signing process, reducing turnaround times.
  • Security: Ensure the integrity and authenticity of documents with advanced encryption and authentication methods.
  • Integration: Seamless integration with other Microsoft Office tools for a streamlined workflow.

Methods to Create an eSignature with Microsoft:

  1. Using Microsoft Word
  2. Using Microsoft Outlook
  3. Using Microsoft Edge and Adobe Sign Integration
  4. Using Third-Party Add-ons: DocuSign and HelloSign

1. Creating an eSignature Using Microsoft Word

Microsoft Word provides several ways to add eSignatures to your documents.

Drawing a Signature:

  1. Open Document: Open the document you need to sign in Microsoft Word.
  2. Draw Signature:
    • Go to “Insert” > “Shapes” > “Scribble.”
    • Use your mouse or stylus to draw your signature on the document.
  3. Save Document: Save the document with your drawn signature.

Inserting a Scanned Signature:

  1. Sign on Paper: Write your signature on a blank piece of paper.
  2. Scan Signature: Scan the signature using a scanner or a smartphone camera.
  3. Insert into Document:
    • Open the document in Microsoft Word.
    • Go to “Insert” > “Pictures” and upload the scanned image of your signature.
  4. Place Signature: Resize and place the image where needed in the document.
  5. Save Document: Save the document with the inserted signature.

Using Digital Signatures:

  1. Prepare Document:
    • Open your document in Microsoft Word.
    • Go to “File” > “Info” > “Protect Document” > “Add a Digital Signature.”
  2. Sign Document:
    • Follow the prompts to add your digital signature, which may involve using a digital certificate.
  3. Save Document: Save the signed document.

2. Creating an eSignature Using Microsoft Outlook

Microsoft Outlook allows you to add eSignatures to your emails, making it easy to sign and send documents.

Step-by-Step Guide:

  1. Create New Email: Open Outlook and create a new email.
  2. Add Signature:
    • Go to “Insert” > “Signature” > “Signatures.”
    • Create a new signature and add your eSignature by drawing, typing, or inserting an image.
  3. Attach Document: Attach the document you need to sign.
  4. Send Email: Send the email with your signed document attached.

3. Creating an eSignature Using Microsoft Edge and Adobe Sign Integration

Microsoft Edge integrates with Adobe Sign, allowing you to sign PDF documents directly within the browser.

Step-by-Step Guide:

  1. Open Document: Open the PDF document you need to sign in Microsoft Edge.
  2. Sign with Adobe Sign:
    • Click on the Adobe Sign icon in the toolbar.
    • Follow the prompts to sign the document using your Adobe Sign account.
  3. Save Document: Save the signed PDF document.

4. Creating an eSignature Using Third-Party Add-ons

DocuSign:

DocuSign offers a Microsoft add-on that integrates seamlessly with Office applications.

Step-by-Step Guide:

  1. Install Add-on:
    • Open Microsoft Word or Outlook.
    • Go to “Insert” > “Add-ins” and search for “DocuSign.”
    • Install the DocuSign add-on.
  2. Sign Document:
    • Open your document in Word or create an email in Outlook.
    • Click on the DocuSign add-on icon and follow the prompts to sign the document.
  3. Save and Send: Save the signed document or send it via email.

HelloSign:

HelloSign also provides an add-on for Microsoft Office applications.

Step-by-Step Guide:

  1. Install Add-on:
    • Open Microsoft Word or Outlook.
    • Go to “Insert” > “Add-ins” and search for “HelloSign.”
    • Install the HelloSign add-on.
  2. Sign Document:
    • Open your document in Word or create an email in Outlook.
    • Click on the HelloSign add-on icon and follow the prompts to sign the document.
  3. Save and Send: Save the signed document or send it via email.
Verified
Most Recommended

Best eSignature service

See how SignNow can streamline your document workflow. Try it free and explore its powerful features.
Rating
On-Going Offer

Legal Validity of eSignatures:

eSignatures are legally binding in many countries, including the United States (under the ESIGN Act) and the European Union (under eIDAS). To ensure your eSignature is legally valid, it must meet the following criteria:

  1. Intent: The signer must intend to sign the document.
  2. Consent: All parties must agree to conduct business electronically.
  3. Authentication: The identity of the signer must be verified.
  4. Integrity: The document must be tamper-proof after signing.
  5. Retention: The signed document must be stored and retrievable for future reference.

FAQs

Q1: Are eSignatures secure?

Yes, eSignatures uses advanced encryption and authentication methods to ensure the security and integrity of the signed documents.

Q2: Are eSignatures legally binding?

In most countries, eSignatures are legally binding under specific regulations like the ESIGN Act in the United States and eIDAS in the European Union.

Q3: Can I use eSignatures for all types of documents?

eSignatures are suitable for most documents, but certain legal and government forms may still require handwritten signatures.

Q4: How do I know if my eSignature is legally binding?

eSignatures are legally binding if they meet the requirements set by relevant regulations, such as intent to sign, consent to conduct business electronically, and proper authentication of the signer’s identity.

Q5: Can eSignatures be used for international transactions?

Yes, eSignatures can be used for international transactions, but it’s essential to ensure compliance with the regulations of the involved countries.

Conclusion:

Using eSignatures with Microsoft tools provides a convenient, efficient, and secure way to handle document signing. Whether using Microsoft Word, or Outlook, or integrating with third-party services like DocuSign and HelloSign, you can streamline your workflow and ensure the legal validity of your signatures. Embrace the digital transformation and make document signing a seamless part of your daily routine with Microsoft eSignatures.

Is SignNow Legit? A Comprehensive Review of This eSignature Solution

Is SignNow Legit?

Introduction:

In today’s digital age, electronic signatures (eSignatures) are indispensable for businesses and individuals. One popular eSignature service is SignNow, but many wonder, is SignNow legit? This article explores SignNow’s legitimacy, features, and user experiences.

What is SignNow?

Verified
Most Recommended

Best eSignature service

See how SignNow can streamline your document workflow. Try it free and explore its powerful features.
Rating
On-Going Offer

SignNow is an eSignature platform that allows users to sign documents online securely and efficiently. It offers features like document templates, team collaboration, and integration with tools like Google Drive and Dropbox.

Key Features of SignNow

  • Ease of Use: The platform has an intuitive interface, simplifying the process of signing and sending documents.
  • Security: SignNow employs robust encryption methods to protect user data.
  • Flexibility: Supports various document formats and offers mobile apps for signing on the go.
  • Integration: Seamlessly integrates with other software tools, enhancing functionality.

User Reviews and Ratings

SignNow has garnered positive reviews on G2 and Trustpilot, with users praising its ease of use, affordability, and customer support. Some users, however, have reported occasional technical issues that are typically resolved promptly.

Best eSignature Service

SignNow Offers

  • E-signatures – Secure and legally binding electronic signatures.
  • Document Management – Easy upload, editing, and storage of documents.
  • Templates – Create and reuse customizable document templates.
  • Collaboration Tools – Share, comment, and collaborate with your team.
  • Integration – Seamless integration with popular apps like Google Drive, Salesforce, and more.
  • Mobile Access – Manage and sign documents on the go via mobile devices.
  • Security & Compliance – Ensures secure data encryption and compliance with industry standards (e.g., GDPR, HIPAA).

Industry Compliance

SignNow complies with eSignature regulations like the ESIGN Act, UETA, and eIDAS, ensuring that electronic signatures are legally binding.

Pricing and Plans

SignNow offers a range of pricing plans suitable for individuals, small businesses, and large enterprises, making it accessible to a broad audience.

FAQs

Q1: Is SignNow safe to use?

Yes, SignNow uses advanced encryption and complies with major eSignature regulations to ensure safety and legality.

Q2: Can I use SignNow for free?

SignNow offers a free trial, but continued use requires a subscription.

Q3: How does SignNow compare to other eSignature platforms?

SignNow is competitively priced and offers similar features to leading platforms like DocuSign and Adobe Sign.

Conclusion

SignNow is a legitimate and reliable eSignature solution, offering robust features, strong security, and positive user feedback. Its compliance with international regulations further underscores its credibility.

eSignatures: Transforming the Way We Do Business

eSignatures

Introduction:

Electronic signatures, or eSignatures, have revolutionized document handling in both personal and professional settings. This article explores what eSignatures are, their benefits, and their impact on business transactions.

What are eSignatures?

An eSignature is a digital version of a handwritten signature used to sign documents electronically. They provide a secure and efficient way to sign contracts, agreements, and other important documents without physical presence.

Benefits of eSignatures

  • Convenience: Sign documents from anywhere at any time.
  • Speed: Reduce turnaround times by quickly obtaining signatures.
  • Cost-Effective: Save on printing, mailing, and storage costs.
  • Security: Advanced encryption and authentication methods ensure the integrity and authenticity of signatures.
Verified
Most Recommended

Best eSignature service

See how SignNow can streamline your document workflow. Try it free and explore its powerful features.
Rating
On-Going Offer

Legal Validity of eSignatures

eSignatures are legally binding in many countries, thanks to regulations like the ESIGN Act in the US and eIDAS in the EU. These laws ensure that eSignatures have the same legal standing as handwritten signatures.

How to Use eSignatures

Using eSignatures is straightforward:

  • Choose a Platform: Select a reputable service like SignNow, DocuSign, or Adobe Sign.
  • Upload Document: Upload the document to the platform.
  • Add Signatures: Place signature fields and invite others to sign.
  • Finalize and Send: Once all parties have signed, the document can be downloaded or shared.
Verified
Most Recommended

Best eSignature service

See how SignNow can streamline your document workflow. Try it free and explore its powerful features.
Rating
On-Going Offer

Industry Applications

eSignatures are used across various industries:

  • Real Estate: Sign purchase agreements and lease contracts.
  • Healthcare: Obtain patient consent forms digitally.
  • Finance: Sign loan documents and financial agreements securely.
  • Legal: Handle contracts and other legal documents efficiently.

FAQs

Q1: Are eSignatures secure? Yes, eSignatures use advanced encryption and authentication methods to ensure security and integrity.

Q2: Are eSignatures legally binding? In most countries, eSignatures are legally binding under specific regulations.

Q3: Can I use eSignatures for all types of documents? eSignatures are suitable for most documents, but certain legal and government forms may still require handwritten signatures.

Conclusion

eSignatures have transformed the way we do business, offering convenience, speed, and security. As technology continues to advance, eSignatures will become even more integral to efficient and effective business operations.

QR Codes for Marketing: Unlocking the Power of Scannable Connections

QR Codes for Marketing

In today’s fast-paced digital landscape, businesses are constantly seeking innovative ways to connect with their audience and streamline their marketing efforts. One technology that has gained tremendous popularity in recent years is the QR code. These simple, square-shaped barcodes are revolutionizing how companies engage with consumers, offering a seamless bridge between the physical and digital worlds.

In this article, we’ll dive deep into the world of QR codes for marketing. We’ll explore what QR codes are, how they work, and the myriad of ways they can be leveraged to enhance your marketing strategy. By the end of this comprehensive guide, you’ll be equipped with the knowledge to implement QR codes effectively and take your marketing campaigns to the next level.

What are QR Codes?

QR codes, short for Quick Response codes, are two-dimensional barcodes that can be scanned using a smartphone or QR code reader. Unlike traditional barcodes, which store information horizontally, QR codes store data both horizontally and vertically, allowing them to hold a much larger amount of information. This makes them incredibly versatile for various applications.

A typical QR code can contain:

  • URLs (web addresses)
  • Contact information (vCards)
  • Text messages
  • Email addresses
  • Wi-Fi network details
  • Event information

The widespread use of smartphones equipped with QR code scanning capabilities has made these codes an accessible and convenient tool for both businesses and consumers.

How Do QR Codes Work?

QR codes work by encoding data into a pattern of black and white squares. When scanned with a QR code reader or a smartphone’s camera, the encoded data is decoded and displayed to the user. The scanning process is quick and efficient, making it an ideal method for delivering information or prompting specific actions.

Here’s a step-by-step breakdown of how QR codes work:

  1. Creation: Using a QR code generator, you input the desired information (e.g., a URL) to create a unique QR code.
  2. Display: The generated QR code can be printed on various marketing materials, such as posters, flyers, business cards, or even displayed digitally.
  3. Scanning: Consumers use their smartphones to scan the QR code. Most modern smartphones have built-in QR code readers within their camera apps.
  4. Action: Once scanned, the QR code directs the user to the encoded content, which could be a website, a contact form, or any other digital asset.

Benefits of Using QR Codes in Marketing

Incorporating QR codes into your marketing strategy can offer numerous benefits:

1. Enhanced Customer Engagement

QR codes provide an interactive element to your marketing materials. By encouraging consumers to scan a code, you can create a more engaging experience, driving higher levels of interaction and participation.

2. Seamless Integration of Offline and Online Marketing

QR codes serve as a bridge between your offline and online marketing efforts. For instance, you can place QR codes on print advertisements, product packaging, or event banners to direct users to your website, social media pages, or online store.

3. Cost-Effective

Creating and printing QR codes is relatively inexpensive, making them a cost-effective addition to your marketing toolkit. Many online QR code generators offer free services, and even paid options are generally affordable.

4. Trackable Analytics

Most QR code generators provide analytics, allowing you to track the performance of your QR codes. You can monitor the number of scans, the location of the scans, and the time of day they were scanned. This data is invaluable for refining your marketing strategy and understanding consumer behavior.

5. Versatile Applications

QR codes can be used in various marketing contexts, from product packaging and business cards to event tickets and promotional merchandise. Their versatility makes them suitable for a wide range of industries and purposes.

Innovative Ways to Use QR Codes in Marketing

Now that we’ve covered the basics, let’s explore some creative and effective ways to incorporate QR codes into your marketing strategy:

1. Product Information and Reviews

Place QR codes on your product packaging to provide detailed information about the product, including specifications, usage instructions, and customer reviews. This additional layer of information can help consumers make informed purchasing decisions.

2. Exclusive Offers and Discounts

Generate QR codes that lead to exclusive offers, discounts, or coupon codes. This not only incentivizes scanning but also encourages repeat business and customer loyalty.

3. Event Promotion and Ticketing

Use QR codes on event posters, flyers, and tickets to provide quick access to event details, registration pages, or virtual event platforms. This streamlines the event promotion process and enhances the attendee experience.

4. Virtual Business Cards

Incorporate QR codes on your business cards that link to your digital contact information or LinkedIn profile. This modernizes the traditional business card exchange, making it easier for contacts to save and access your information.

5. Interactive Print Ads

Enhance your print advertisements with QR codes that link to engaging content such as video demonstrations, interactive infographics, or augmented reality experiences. This adds a dynamic element to your print media.

6. Customer Feedback and Surveys

Encourage customers to provide feedback by including QR codes on receipts, product packaging, or at points of sale. Scanning the code can lead to a quick survey or feedback form, helping you gather valuable insights.

7. Restaurant Menus

Many restaurants have adopted QR codes for contactless menus. Diners can scan the code to view the menu on their smartphones, reducing physical contact and enhancing the dining experience.

8. Social Media Integration

Create QR codes that link directly to your social media profiles or specific posts. This can drive traffic to your social media channels and increase your follower count.

Best Practices for Implementing QR Codes in Marketing

To maximize the effectiveness of QR codes in your marketing strategy, consider the following best practices:

1. Ensure Scannability

Make sure your QR codes are easily scannable by using high-contrast colors and placing them on flat surfaces. Avoid placing them on highly textured backgrounds or in areas with poor lighting.

2. Provide Clear Instructions

Accompany your QR codes with clear instructions or a call-to-action (CTA). Let users know what they can expect after scanning the code, whether it’s accessing a discount, viewing a video, or filling out a survey.

3. Optimize Landing Pages

Ensure that the landing pages linked to your QR codes are mobile-friendly and optimized for a seamless user experience. Slow-loading or non-responsive pages can frustrate users and reduce engagement.

4. Test Before Launch

Before rolling out your QR code campaign, test the codes on multiple devices and QR code readers to ensure they work correctly. This helps identify and resolve any potential issues.

5. Track Performance

Use QR code analytics to track the performance of your codes. Monitor metrics such as the number of scans, time of day, and geographic location to gain insights into consumer behavior and campaign effectiveness.

6. Keep Content Updated

Ensure that the content linked to your QR codes is regularly updated. Outdated or irrelevant information can lead to a poor user experience and diminish trust in your brand.

FAQs About QR Codes for Marketing

Q: Are QR codes still relevant in today’s digital age?

A: Yes, QR codes remain highly relevant due to their versatility, ease of use, and ability to seamlessly connect offline and online marketing efforts. The widespread use of smartphones has further cemented their place in modern marketing.

Q: Do I need a special app to scan QR codes?

A: Most modern smartphones have built-in QR code scanning capabilities within their camera apps. Additionally, there are numerous free QR code reader apps available for download on app stores.

Q: Can QR codes be customized to match my brand’s aesthetics?

A: Absolutely! Many QR code generators offer customization options, allowing you to change the color, incorporate your logo, and adjust the design to align with your brand’s visual identity.

Q: How do I create a QR code?

A: Creating a QR code is simple. You can use online QR code generators, where you input the desired information (e.g., a URL), and the tool generates a unique QR code that you can download and use.

Q: Are there any security concerns with using QR codes?

A: While QR codes themselves are safe, it’s important to ensure the linked content is secure and trustworthy. Avoid linking to potentially harmful websites and regularly monitor your QR codes for any unauthorized changes.

Q: Can I track the performance of my QR code campaigns?

A: Yes, many QR code generators provide analytics tools that allow you to track the performance of your QR codes. You can monitor metrics such as the number of scans, geographic location, and time of day.

Conclusion

QR codes have emerged as a powerful tool in the marketer’s arsenal, offering a unique and efficient way to connect with consumers and enhance the overall marketing strategy. By understanding how QR codes work and implementing them effectively, you can create engaging, interactive experiences that bridge the gap between your offline and online marketing efforts.

Whether you’re looking to provide product information, offer exclusive discounts, promote events, or gather customer feedback, QR codes offer a versatile and cost-effective solution. Embrace the power of QR codes in your marketing campaigns and watch as they unlock new opportunities for engagement and growth.

Remember, the key to successful QR code marketing lies in careful planning, clear instructions, and regular monitoring. Stay creative, stay informed, and let QR codes elevate your marketing game to new heights.

Are There Any SignNow Scams? What You Need to Know

Verified
Most Recommended

Best eSignature service

See how SignNow can streamline your document workflow. Try it free and explore its powerful features.
Rating
On-Going Offer

With the increasing use of digital transactions, concerns about online scams have grown. SignNow, a popular eSignature service, has been subject to scrutiny. This article explores whether there are any SignNow scams and how to protect yourself.

Understanding The Concerns

Are There Any SignNow Scams?

While SignNow is a legitimate service, scammers have exploited its name to deceive users. These scams often involve phishing emails or fake websites mimicking SignNow’s interface.

Common Types of Scams

  • Phishing Emails: Scammers send emails that appear to be from SignNow, asking for personal information.
  • Fake Websites: Fraudulent websites mimic SignNow to trick users into providing credentials.
  • Unauthorized Charges: Some users report unauthorized charges due to using third-party services posing as SignNow.

How to Spot a Scam

  • Check the URL: Ensure you are on the official SignNow website (signnow.com).
  • Verify Emails: Look for signs of phishing, such as unusual email addresses and requests for sensitive information.
  • Monitor Your Account: Regularly check your account for unauthorized activity.

Protecting Yourself

  • Use Strong Passwords: Create unique, strong passwords for your SignNow account.
  • Enable Two-Factor Authentication: Adds an extra layer of security.
  • Stay Informed: Keep up to date with security updates and alerts from SignNow.

FAQs

Q1: How can I report a SignNow scam?

Report it to SignNow customer support immediately and follow their guidance.

Q2: Is it safe to enter my payment information on SignNow?

Yes, the official SignNow website uses secure encryption to protect payment information.

Q3: What should I do if I receive a suspicious email from SignNow?

Do not click on any links or provide personal information. Forward the email to SignNow’s support team for verification.

Conclusion

While SignNow is legitimate and secure, users should remain vigilant against scams that misuse its name. By following best practices for online security, you can protect yourself from potential threats.

Electronic Signature Verification: An Ultimate Guide

Electronic Signature Verification

Electronic signatures have become a cornerstone of modern digital transactions, providing a convenient and efficient way to sign documents. However, ensuring the authenticity and integrity of these signatures is crucial. This article explores the importance of electronic signature verification, the methods used, and the steps involved in the verification process.

Importance of Electronic Signature Verification

Verification of electronic signatures is essential for several reasons:

  • Authenticity: Confirms that the signature was made by the intended signer.
  • Integrity: Ensures that the document has not been altered after signing.
  • Legal Compliance: Meets legal and regulatory requirements for electronic transactions.
  • Security: Protects against fraud and unauthorized access.
Verified
Most Recommended

Best eSignature service

See how SignNow can streamline your document workflow. Try it free and explore its powerful features.
Rating
On-Going Offer

Steps for Electronic Signature Verification

1. Check the Audit Trail

Review the audit trail provided by the electronic signature platform to verify the signer’s information, timestamp, and sequence of actions.

  • Review Details: Ensure that the signer’s information matches the expected identity.
  • Verify Actions: Confirm that the sequence of actions aligns with the expected signing process.

2. Verify Digital Certificates

For digital signatures, verify the validity and authenticity of the digital certificate issued by the CA.

  • Check Certificate Status: Ensure that the certificate is not expired or revoked.
  • Verify CA: Confirm that the CA is trusted and recognized.

3. Authenticate Biometric Data

If biometric data is used, verify the biometric information against the signer’s stored data.

  • Match Biometric Data: Ensure that the biometric data matches the stored information.
  • Verify Device: Confirm that the device used to capture biometric data is secure and trusted.

4. Conduct Knowledge-Based Authentication (KBA)

If KBA is used, verify that the signer answered the security questions correctly.

  • Review Answers: Ensure that the answers match the expected responses.
  • Check Additional Factors: If 2FA is used, verify the second form of authentication.

Benefits of Electronic Signature Verification

1. Enhanced Security

Verification methods, such as digital certificates and biometric data, provide a high level of security, ensuring that the signature is authentic and the document is secure.

  • Encryption: Protects the document from unauthorized access and tampering.
  • Authentication: Confirms the signer’s identity, reducing the risk of fraud.

2. Legal Compliance

Verification ensures that electronic signatures meet legal and regulatory requirements, providing legal assurance for electronic transactions.

  • Regulatory Compliance: Meets standards set by regulations such as eIDAS, HIPAA, and FDA.
  • Legal Assurance: Provides evidence that the signature is valid and legally binding.

3. Improved Trust

Verification builds trust between parties involved in the transaction, ensuring that the signature is authentic and the document is secure.

  • Trustworthiness: Ensures that the signature is trustworthy and reliable.
  • Transparency: Provides transparency in the signing process through detailed audit trails.
Verified
Most Recommended

Best eSignature service

See how SignNow can streamline your document workflow. Try it free and explore its powerful features.
Rating
On-Going Offer

Challenges and Considerations

1. Technology Implementation

Implementing electronic signature verification requires investment in technology and infrastructure.

  • Integration: Integrate verification methods with existing systems and workflows.
  • Training: Train staff on how to use verification tools and processes.

2. Security and Privacy

Ensuring the security and privacy of electronic signatures and verification data is crucial.

  • Data Protection: Implement robust data protection measures, such as encryption and access controls.
  • Privacy Concerns: Address privacy concerns related to the collection and storage of biometric data and personal information.

3. Compliance Management

Navigating complex regulatory requirements can be challenging.

  • Regular Audits: Conduct regular audits to ensure compliance with relevant regulations.
  • Legal Expertise: Consult with legal experts to ensure that verification practices meet all regulatory requirements.

Conclusion

Electronic signature verification is a critical component of secure and compliant digital transactions. By employing robust verification methods, such as audit trails, digital certificates, biometric data, and knowledge-based authentication, businesses can ensure the authenticity and integrity of electronic signatures. Verification not only enhances security and legal compliance but also builds trust between parties involved in the transaction. As digital transformation continues to advance, electronic signature verification will remain an essential tool for securing and validating electronic documents.

What is an eSignature? A Comprehensive Guide

Introduction:

In today’s digital age, the traditional way of signing documents with pen and paper is rapidly being replaced by electronic signatures, commonly known as eSignatures. These digital tools offer a convenient, secure, and efficient way to sign agreements, contracts, and other important documents online. This guide will provide an in-depth understanding of eSignatures, their benefits, how they work, and their legal implications.

What is an eSignature?

An eSignature, or electronic signature, is a digital version of a handwritten signature used to sign documents electronically. It signifies a person’s intent to agree to the contents of a document. eSignatures are used in various industries, including real estate, finance, healthcare, and legal services, to streamline the document signing process.

Types of eSignatures:

  1. Simple eSignatures: “Basic electronic signatures include typing your name, checking a box, or inserting a scanned image.”
  2. Advanced eSignatures: “These include encryption to verify the signer’s identity and ensure document integrity.”
  3. Qualified eSignatures: The most secure form, using digital certificates issued by trusted certificate authorities to provide the highest level of legal validity.

Benefits of eSignatures:

  1. Convenience: Sign documents from anywhere at any time using a computer, tablet, or smartphone.
  2. Efficiency: Reduce the time needed to obtain signatures, speeding up the document signing process.
  3. Cost-Effective: Save on printing, mailing, and storage costs.
  4. Security: Advanced encryption and authentication methods ensure the integrity and authenticity of signatures.
  5. Legal Validity: eSignatures are legally binding in many countries under regulations such as the ESIGN Act and eIDAS.

How Do eSignatures Work?

eSignatures typically involve the following steps:

  1. Document Preparation: The document to be signed is uploaded to an eSignature platform.
  2. Signer Identification: The platform verifies the identity of the signer through various methods, such as email authentication, SMS codes, or digital certificates.
  3. Signature Placement:“The signer adds their eSignature by clicking, typing, drawing, or uploading an image.”
  4. Document Submission: “The signed document is stored electronically with an audit trail recording timestamps and IP addresses.”

Popular eSignature Tools:

  1. DocuSign: A widely used platform that offers comprehensive eSignature solutions for businesses of all sizes.
  2. Adobe Sign: Integrated with Adobe Acrobat, it provides a seamless way to sign and manage PDF documents.
  3. HelloSign: Known for its user-friendly interface and integration with Google Workspace.
  4. SignNow: Offers a robust set of features for businesses, including advanced security options.
  5. PandaDoc: Combines eSignatures with document management and workflow automation.
Verified
Most Recommended

Best eSignature service

See how SignNow can streamline your document workflow. Try it free and explore its powerful features.
Rating
On-Going Offer

Legal Validity of eSignatures:

eSignatures are legally binding in many countries under specific regulations:

  • United States: The ESIGN Act (Electronic Signatures in Global and National Commerce Act) and UETA (Uniform Electronic Transactions Act) provide the legal framework for eSignatures.
  • European Union: eIDAS (Electronic Identification, Authentication, and Trust Services) regulation governs the use of eSignatures, ensuring their legal recognition and security.
  • Other Countries: “Many countries recognize eSignatures as legally equivalent to handwritten signatures.”

To ensure your eSignature is legally binding, it must meet certain criteria:

  1. Intent: The signer must intend to sign the document.
  2. Consent: All parties must agree to conduct business electronically.
  3. Authentication: The identity of the signer must be verified.
  4. Integrity: The document must be tamper-proof after signing.
  5. Retention: The signed document must be stored and retrievable for future reference.

FAQs

Q1: Are eSignatures secure? Yes, eSignatures use advanced encryption and authentication methods to ensure the security and integrity of the signed documents.

Q2: Are eSignatures legally binding? In most countries, eSignatures are legally binding under specific regulations like the ESIGN Act in the United States and eIDAS in the European Union.

Q3: Can I use eSignatures for all types of documents? eSignatures are suitable for most documents, but certain legal and government forms may still require handwritten signatures.

Q4: How do I know if my eSignature is legally binding? eSignatures are legally binding if they meet the requirements set by relevant regulations, such as intent to sign, consent to conduct business electronically, and proper authentication of the signer’s identity.

Q5: Can eSignatures be used for international transactions? Yes, eSignatures can be used for international transactions, but it’s essential to ensure compliance with the regulations of the involved countries.

Conclusion

eSignatures offer a modern, efficient, and secure way to sign documents electronically. Understanding eSignatures, their benefits, and the legal framework enables confident adoption for personal and professional use. Embrace the convenience and efficiency of eSignatures to streamline your document signing process in today’s digital world.

How to Send Mass Email in Outlook: Boost Your Reach

How to Send Mass Email in Outlook

To send mass emails in Outlook, use the Mail Merge feature in Microsoft Word. This allows personalized bulk emails.

Sending mass emails in Outlook is a crucial skill for businesses and organizations. It streamlines communication, saving time and effort. With Outlook’s Mail Merge feature, you can send personalized emails to multiple recipients efficiently. This tool integrates with Microsoft Word, allowing you to create a single template.

You can then merge it with a recipient list, ensuring each email feels personal. This method not only enhances communication but also increases engagement rates. Follow these steps to maximize your email campaigns and maintain a professional touch in your correspondence. Properly managing mass emails helps in building strong customer relationships and achieving marketing goals.

How to Send Mass Email in Outlook

Credit: support.microsoft.com

Introduction To Mass Emailing

Mass emailing is a powerful tool for reaching many people. It helps businesses, organizations, and individuals communicate efficiently. Sending one email to many recipients saves time and effort.

Benefits Of Email Campaigns

Email campaigns offer many benefits. They help in promoting products and services. They also build relationships with customers. Here are some key advantages:

  • Wide Reach: Reach many people at once.
  • Cost-Effective: Save money compared to traditional mail.
  • Personalization: Customize emails for different audiences.
  • Analytics: Track open rates and clicks.
  • Quick Communication: Send updates and news instantly.

Why Use Outlook For Mass Emails?

Outlook is a popular email service. It is user-friendly and reliable. Here are reasons to use Outlook for mass emails:

  1. Integration: Connect with Microsoft Office tools.
  2. Templates: Use email templates for consistency.
  3. Scheduling: Schedule emails to send at the best times.
  4. Contacts: Manage contact lists easily.
  5. Security: Protect emails with strong security features.
FeatureBenefit
IntegrationWork seamlessly with other Microsoft tools.
TemplatesCreate consistent and professional emails.
SchedulingSend emails at the optimal time.
ContactsManage your contact list with ease.
SecurityKeep your emails secure.

Essentials Before Sending Mass Emails

Sending mass emails can be powerful. Yet, it needs careful planning. You must ensure your emails are effective and legal. Here are the essentials before sending mass emails in Outlook.

Understanding Your Audience

Knowing your audience is crucial. Understand what they like and need. Create a list of their preferences. Use this to craft your email content.

  • Age
  • Interests
  • Location
  • Previous interactions

Crafting A Compelling Message

Your message must grab attention. Use a strong subject line. Keep your email short and clear. Use bullet points for easy reading. Add a clear call-to-action (CTA).

  1. Start with a strong subject line.
  2. Keep the message short.
  3. Use bullet points.
  4. Add a clear CTA.

Legal Compliance And Privacy

Legal compliance is key. Ensure your email meets legal standards. Follow privacy laws like GDPR. Always include an unsubscribe option. Protect your audience’s data.

RequirementDescription
GDPRFollow data protection rules.
Unsubscribe OptionAlways provide an opt-out link.
Data ProtectionSecure your audience’s personal data.

Setting Up Outlook For Mass Mailing

Sending mass emails in Outlook can save you time. You can reach many people with one click. This guide will help you set up Outlook for mass mailing.

Creating A Contact Group

First, you need to create a Contact Group. A Contact Group is a list of email addresses. Follow these steps:

  1. Open Outlook.
  2. Go to People or Contacts view.
  3. Click on New Contact Group.
  4. Name your Contact Group.
  5. Click on Add Members.
  6. Select From Address Book or New E-mail Contact.
  7. Add the email addresses you want.
  8. Click Save & Close.

Configuring Outlook Settings

To send mass emails, you need to adjust some settings in Outlook. Here’s how:

  • Open Outlook and click File.
  • Select Options.
  • Go to the Mail tab.
  • Scroll down to the Send Messages section.
  • Check the box for Do not deliver before if you want to schedule emails.
  • Click OK to save your settings.

Now, you are ready to send mass emails in Outlook. You have set up a Contact Group. You have also configured the necessary settings.

Writing Effective Emails

Sending mass emails in Outlook can be powerful. But writing effective emails is key. Your email needs to grab attention. This section will help you write emails that get results.

Subject Line Strategies

The subject line is crucial. It decides if your email gets opened. Here are some tips for writing strong subject lines:

  • Keep it short and clear. Aim for 6-10 words.
  • Use action words. Words like “Join,” “Save,” “Get” encourage action.
  • Make it personal. Add the recipient’s name if possible.
  • Create a sense of urgency. Phrases like “Limited Time Offer” work well.

Body Content Tips

Your email body should be engaging and easy to read. Follow these tips to write clear and effective content:

  1. Start with a greeting: Use a friendly and professional tone.
  2. Get to the point: State the purpose of your email early.
  3. Use short paragraphs: Break content into small chunks.
  4. Include bullet points: Lists make information easy to digest.
  5. Be clear and concise: Avoid jargon and complex words.
  6. Use images: Relevant images can capture attention.

Call-to-action Techniques

Every email needs a call-to-action (CTA). A CTA tells the reader what to do next. Here are some effective CTA strategies:

Words like “Click,” “Download,” and “Register” prompt action.Description
Use Action WordsWords like “Click,” “Download,” “Register” prompt action.
Be SpecificTell the reader exactly what you want them to do.
Create UrgencyUse phrases like “Act Now” or “Limited Time.”
Make it Stand OutUse bold text or buttons to highlight the CTA.

Personalization And Segmentation

Sending mass emails in Outlook can be effective. Personalization and segmentation are key to success. Personalizing emails makes them more engaging. Segmenting your audience ensures the right message reaches the right people.

Tailoring Your Message

Personalized emails feel special to the reader. Use their name in the greeting. Mention their past interactions or purchases. This builds a connection.

Here are some ways to tailor your message:

  • Use their name: Start with “Hi [Name]”.
  • Reference past actions: Mention their last purchase or query.
  • Offer personalized deals: Suggest products based on their interests.

Segmenting Your Audience

Segmenting helps you target the right group. This increases engagement. Divide your audience into smaller groups. Use criteria like age, location, or purchase history.

Here are steps to segment your audience:

  1. Collect data: Gather information like age, location, and interests.
  2. Create segments: Group your audience by similar traits.
  3. Target each segment: Send tailored messages to each group.
Segment TypeCriteriaMessage Focus
New SubscribersSubscribed in the last monthWelcome message
Frequent BuyersMade multiple purchasesLoyalty rewards
Occasional BuyersOne or two purchasesSpecial offers

Integrating Attachments And Visuals

Sending mass emails in Outlook can be more effective with attachments and visuals. These elements can make your emails more engaging and informative. Below, we’ll explore how to add attachments safely and enhance emails with images.

Adding Attachments Safely

Attachments can provide valuable information to your recipients. Follow these steps to add attachments safely:

  1. Open your Outlook and compose a new email.
  2. Click on the Attach File icon in the toolbar.
  3. Choose the file from your computer.
  4. Ensure the file size is not too large.
  5. Verify that the file is free from viruses.

To avoid large file issues, consider using cloud storage. Upload your files to services like OneDrive or Google Drive. Then, share the link in your email.

Enhancing Emails With Images

Images can make your emails more attractive. Follow these steps to add images:

  1. Open your Outlook and compose a new email.
  2. Click on the Insert Pictures icon in the toolbar.
  3. Select the image from your computer.
  4. Adjust the image size and position as needed.

Ensure your images are optimized for email:

  • Use a web-friendly format like JPEG or PNG.
  • Keep the file size below 1MB.
  • Use descriptive alt text for accessibility.

Images can also be used as links. Select the image and click the Link icon. Enter the URL you want to link to.

StepAction
1Compose a new email.
2Click Insert Pictures.
3Select and adjust image.
4Add alt text.
5Link the image (optional).

Using attachments and visuals can make your mass emails more effective. Follow these tips to ensure your emails are both engaging and safe.

Testing And Troubleshooting

Testing and troubleshooting are essential steps in sending mass emails in Outlook. These steps help ensure your emails reach their intended recipients without issues. This section covers how to preview your emails and address common problems.

Previewing Emails

Preview your emails before sending them to a large audience. This helps you catch any mistakes or formatting issues.

  • Open your draft email in Outlook.
  • Click on the “File” tab.
  • Select “Print” to see a preview of your email.

Alternatively, you can send a test email to yourself or a colleague. This allows you to see exactly how your email will look in the recipient’s inbox.

Addressing Common Issues

Several issues can arise when sending mass emails. Here are some common problems and how to solve them.

IssueSolution
Emails marked as spamCheck your content for spammy words. Use a reputable email service.
Broken linksTest all links before sending. Ensure they are not outdated.
Formatting issuesPreview your email. Use simple HTML and inline styles.
Attachments not openingEnsure your attachments are in a compatible format. Use common file types.

Follow these steps to ensure your mass emails are effective and error-free.

Executing The Mass Email Send-out

Sending a mass email in Outlook requires careful steps. This ensures your email reaches your audience effectively. Let’s dive into the key steps.

Final Checklist Before Sending

Before you hit the send button, review this checklist:

  • Recipient List: Ensure all emails are correct.
  • Subject Line: Keep it clear and engaging.
  • Email Content: Check for spelling and grammar errors.
  • Attachments: Verify all attachments are included.
  • Personalization: Use names and other personal details.
  • Unsubscribe Link: Make sure it is easy to find.

Sending The Email Blast

Once everything is set, follow these steps to send your email:

  1. Open Outlook and click on New Email.
  2. Enter your recipients in the Bcc field.
  3. Write your subject line in the Subject field.
  4. Compose your email in the message body.
  5. Attach any necessary files.
  6. Click on Send to dispatch your email blast.

Following these steps ensures a successful email send-out. Always double-check before sending.

Analyzing The Impact

Sending mass emails in Outlook is only half the battle. To understand your campaign’s success, you need to analyze its impact. This involves tracking open and click rates. Evaluating these metrics helps measure your campaign’s effectiveness.

Tracking Open And Click Rates

Open rates show how many people opened your email. This metric indicates the effectiveness of your subject line and sender name.

Click rates measure how many recipients clicked on links in your email. This helps you understand the engagement level of your content.

MetricImportance
Open RateShows initial interest
Click RateMeasures engagement

To track these metrics, use tools like Outlook’s built-in analytics or third-party services. These tools provide detailed insights into your email performance.

Evaluating Campaign Success

Evaluate your campaign’s success by comparing open and click rates against your goals. Low open rates may mean your subject line needs work. Low click rates might suggest your content isn’t engaging.

Here are some steps to evaluate your campaign:

  1. Set clear goals for open and click rates.
  2. Track these metrics using analytics tools.
  3. Compare the results with your goals.
  4. Identify areas for improvement.

Use the data to refine your future email campaigns. This helps improve engagement and achieve better results.

Best Practices For Future Campaigns

To excel in email marketing, follow some essential practices. These practices help improve engagement and ensure better results.

Learning From Feedback

Feedback is a valuable tool for any campaign. Here’s how to use it effectively:

  • Read every response: Understand what your audience likes or dislikes.
  • Check open rates: High open rates mean your subject line works.
  • Analyze click-through rates: See which links attract attention.
  • Use surveys: Ask subscribers their thoughts on your emails.

Staying Updated With Email Marketing Trends

Email marketing trends change quickly. Stay updated to keep your campaigns effective:

  1. Follow industry blogs: Read blogs about email marketing trends.
  2. Attend webinars: Webinars offer insights from experts.
  3. Join forums: Participate in discussions with other marketers.
  4. Use new tools: Try the latest email marketing tools.
PracticeDescription
Read every responseUnderstand audience preferences
Check open ratesEvaluate subject line effectiveness
Analyze click-through ratesIdentify engaging content
Use surveysGather direct feedback
Follow industry blogsStay informed on trends
Attend webinarsGain expert insights
Join forumsDiscuss with peers
Use new toolsExplore latest technologies


How to Send Mass Email in Outlook: Boost Your Reach

Credit: www.brevo.com

Frequently Asked Questions

How To Send Mass Email In Outlook Without Showing Addresses?

Use the Bcc (Blind Carbon Copy) field to send mass emails without showing addresses. Add recipients in the Bcc field.

How Do I Send An Email To Bulk Recipients?

Use email marketing tools like Mailchimp or Sendinblue. Import your recipient list. Craft your email. Click send.

Is There A Way To Mass Forward Emails In Outlook?

Yes, you can mass-forward emails in Outlook. Use the “Rules” feature to automatically forward multiple emails.

How Do I Send An Email To All Contacts In Outlook?

Go to Outlook. Create a new email. Click “To,” select “All Contacts,” and add them. Compose and send your email.

Conclusion

Mastering mass email in Outlook boosts productivity and communication. Follow these steps to streamline your email campaigns. Stay organized, personalize messages, and ensure your emails reach the right audience. With practice, sending mass emails in Outlook becomes a straightforward task.

Start implementing these tips today and enhance your email efficiency.